:: Elektronika MK :: Nokia 92xx Archive :: Kannel for Windows ::
-- Переключиться на Русский --
News №7
WAP 1.x: How to setup
This note describes the process of setting up a WAP gateway (Kannel) and a Dial-in service
to make a WAP connection on older phones with a browser standard WAP 1.x.
Video version: youtu.be/GAVg_ydzpaM
For configuration on Windows systems, Windows XP is used as an example.
For configuration on Linux systems, Ubuntu 22.04 is used as an example.
- A bit of WAP theory
- Setting up Kannel WAP gateway: Windows
- Setting up Kannel WAP gateway: Linux
- Restricting access to private resources
- Checking the gateway using an emulator (on Windows)
- Gateway port forwarding
- Setting up a profile and accessing WAP on a real phone with GPRS
- Attention Siemens users (Java download via WAP)
- Setting up Dial-in service: preparation
- Setting up Dial-in service: Windows
- Setting up Dial-in service: Linux*
- Setting up a profile and accessing WAP on a real phone with CSD
- To the attention of people who have opened their public WAP gateways and Dial-in services
1. A bit of WAP theory
Why do we need such server things? Let's look at the general scheme of a WAP connection for a CSD phone (WAP over CSD):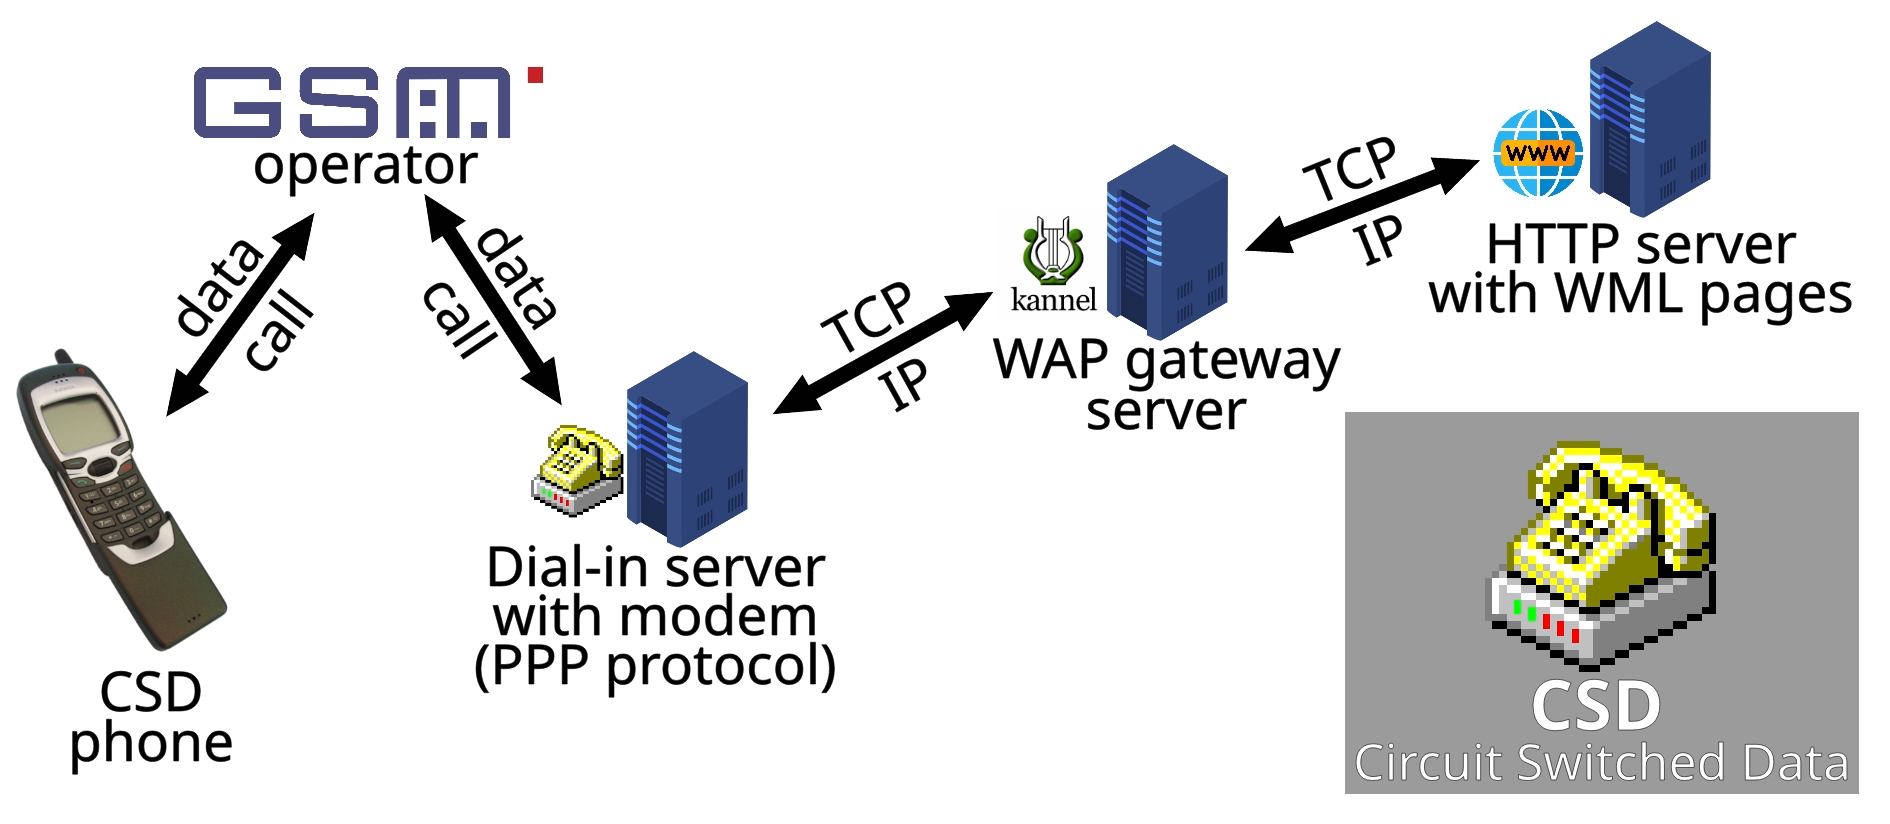
As you can see, the phone is not able to receive data directly from the HTTP(S) server on which the WML format pages are located (although later WAP 1.x phones had support for full-fledged HTML pages). To begin with, of course, he needs a Dial-in server with a GSM modem, with which, using CSD (Circuit Switched Data) technology, the phone makes connection (calls a number) and gains Internet access.
Previously, such "access numbers" were available from the operators themselves (with payment for the time of use), but now (end of 2023) most operators have their Dial-in servers disabled. Moreover, in some cases, the operator completely disables CSD support in the network (when you try to make a call, the call is immediately dropped), requiring the subscription of a separate service (paid or free). In the worst case scenario, the operator may have no information at all about the CSD on its network.
One thing is for sure - to organize your own Dial-in server, you need CSD support from your network operator - check with them for details.
In the case of a phone that supports GPRS (WAP over GPRS), the situation changes dramatically for the better. The Dial-in server is excluded from the chain:
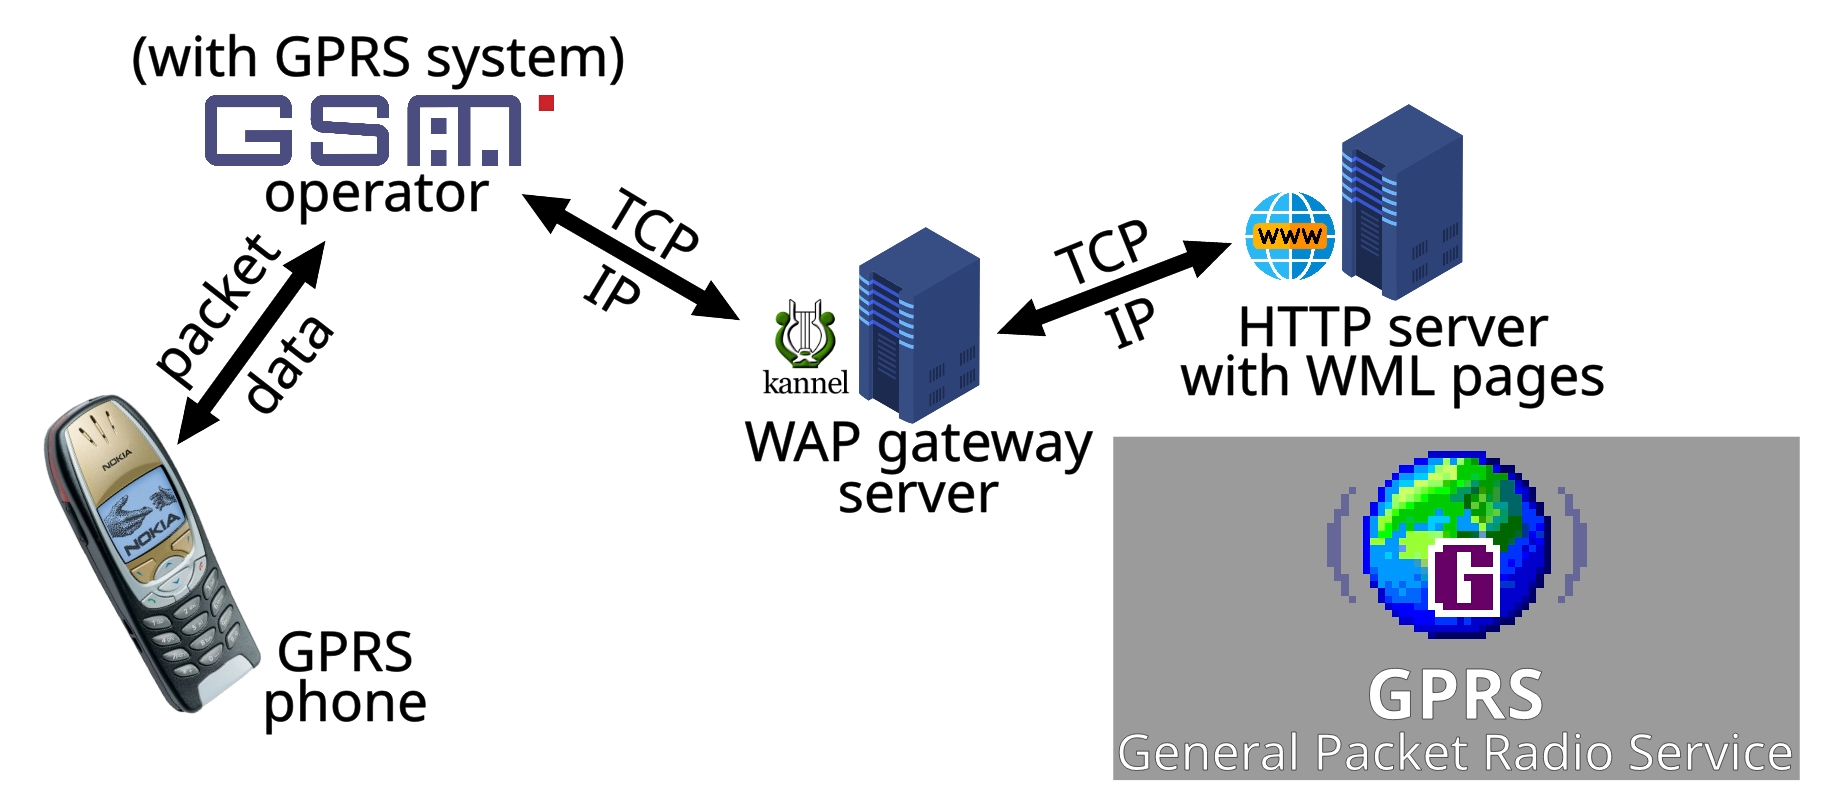
However, in both cases the need for a second (and, perhaps, main) server does not disappear. I'm talking about the WAP gateway. In fact, its task is to do all the "dirty" work instead of a mobile phone. The first phones with WAP were quite weak, so the main burden of working with DNS requests, HTTP(S) server and compiling WML/WMLScript files into the binary format (to save traffic and RAM on the phone, as well as simplify the parsing mechanism in the device’s browser) was assigned to the gateway. Like Dial-in servers, gateways were also previously present at operators, and some still have them, but may require the use of a special APN profile, traffic for which is much more expensive than regular GPRS.
2. Setting up Kannel WAP gateway: Windows
Of course, it is not necessary to set up your server. There are free independent WAP gateways, to use which you just need to enter their IP address into your phone profile. The list is available at bs0dd.net/gateway_en.However, for reliability and confidence it is always useful to have your own server (all you need is a public (“white”) IP address).
The WAP gateway software in most cases was paid, was not cheap and was designed for cellular network operators, who paid for the gateway with the help of ordinary users, of course.
This is where the Kannel (www.kannel.org) gateway with its open source code stands out. Perhaps the only free gateway. It is perfect for our case.
Unfortunately, Kannel does not have an assembly for Windows, so I had to assemble the kit myself. You can download it on the subsite winkannel.bs0dd.net.
Version 1.4.5 is recommended for download.
Installation is quite simple. Unpack the archive to any location.

We are interested in the startwap.bat script; it launches the Bearerbox (core module) and Wapbox (WAP module) modules. The basic configuration is already written in the kannel.conf file. The gateway can be more finely configured using instructions on the official page: www.kannel.org/userguide.shtml.
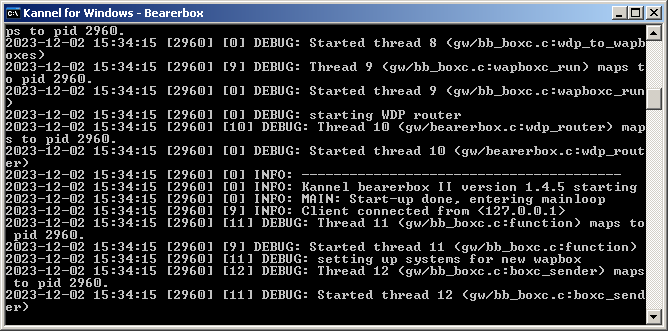
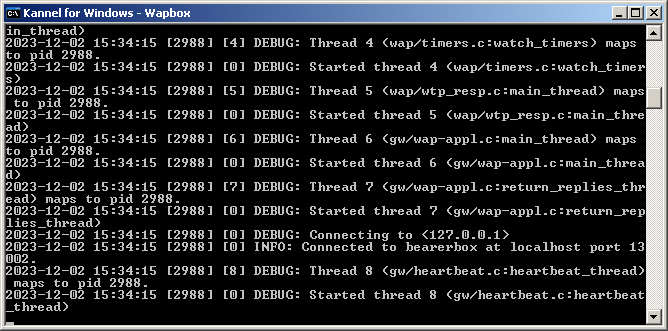
We run the script and see two consoles in front of us. Kannel is up and running.
3. Setting up Kannel WAP gateway: Linux
In Debian compatible distributions the situation is even simpler - Kannel is available for download through the APT package manager. Just enter:
(sudo)* apt install kannel
* if the command is not executed as user root.
The gateway will be installed and will be ready for use immediately. It can be managed using the Systemd
service system through the service and systemctl utilities.

As for other distributions, I did not check the presence of Kannel in their package managers. You may have to assemble it yourself. I assume that a user using a non-Debian Linux distribution has sufficient experience to build applications and manually configure to work with the present in the distribution service management system.
4. Restricting access to private resources
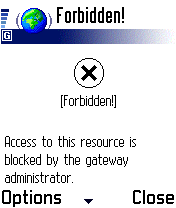
Since all requests to HTTP(S) servers are made on behalf of Kannel, the WAP gateway user will have access to devices on the local network, which can be very undesirable, especially for gateways organized in a home network (few people want to be able to use the gateway go, for example, to router settings).Therefore, it is recommended to deny the HTTP and HTTPS gateway access to the internal network.
This can be done using remapping a URL to an invalid address:
map-url-max = 1
map-url-0 = "http://192.168.1.* /"
map-url-1 = "https://192.168.1.* /"
Or make a page with a message about the forbidding and redirect there:
map-url-max = 1
map-url-0 = "http://192.168.1.* http://wap.bs0dd.net/forbid.wml"
map-url-1 = "https://192.168.1.* http://wap.bs0dd.net/forbid.wml"
If you need to allow access to the local server, add a "exception" (pay attention to the slash at the end, it is needed for correct string parsing):
map-url-max = 3
map-url-0 = "http://192.168.1.15/ http://192.168.1.15/"
map-url-1 = "https://192.168.1.15/ https://192.168.1.15/"
map-url-2 = "http://192.168.1.* http://wap.bs0dd.net/forbid.wml"
map-url-3 = "https://192.168.1.* http://wap.bs0dd.net/forbid.wml"
If you need access to more than one local address, add the same "exceptions" before the deny rules.
The main thing to remember is that the parameter "map-url-max" is counted from zero, so if you have 4 remaps, specify the number 3 in the parameter, etc.
Additionally, you can add the line to the configuration:
smart-errors = true
In this case, Kannel must generate WML pages with error information, for example, when requesting a non-existent page.
However, it seems that this does not work on all phones.
5. Checking the gateway using an emulator (on Windows)
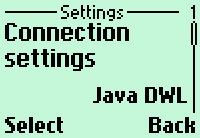
You can check the operation using the Nokia 3410 emulator, with a working WAP browser.You can download it here: archive.org/details/nokia-3410-sdk.
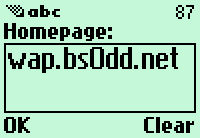
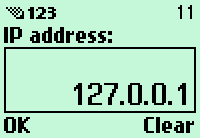
Go to "Services" (this is a WAP browser) -> "Settings" -> "Connection settings" -> "Java DWL" (first profile). Set home page and IP address (local 127.0.0.1, if the gateway is running on this computer, or the address of the server with the gateway on the local network).

Now open the home page ("Home"). If everything is fine with the gateway, the page will open, and various debugging information will be displayed in the logs of the gateway modules.

6. Gateway port forwarding
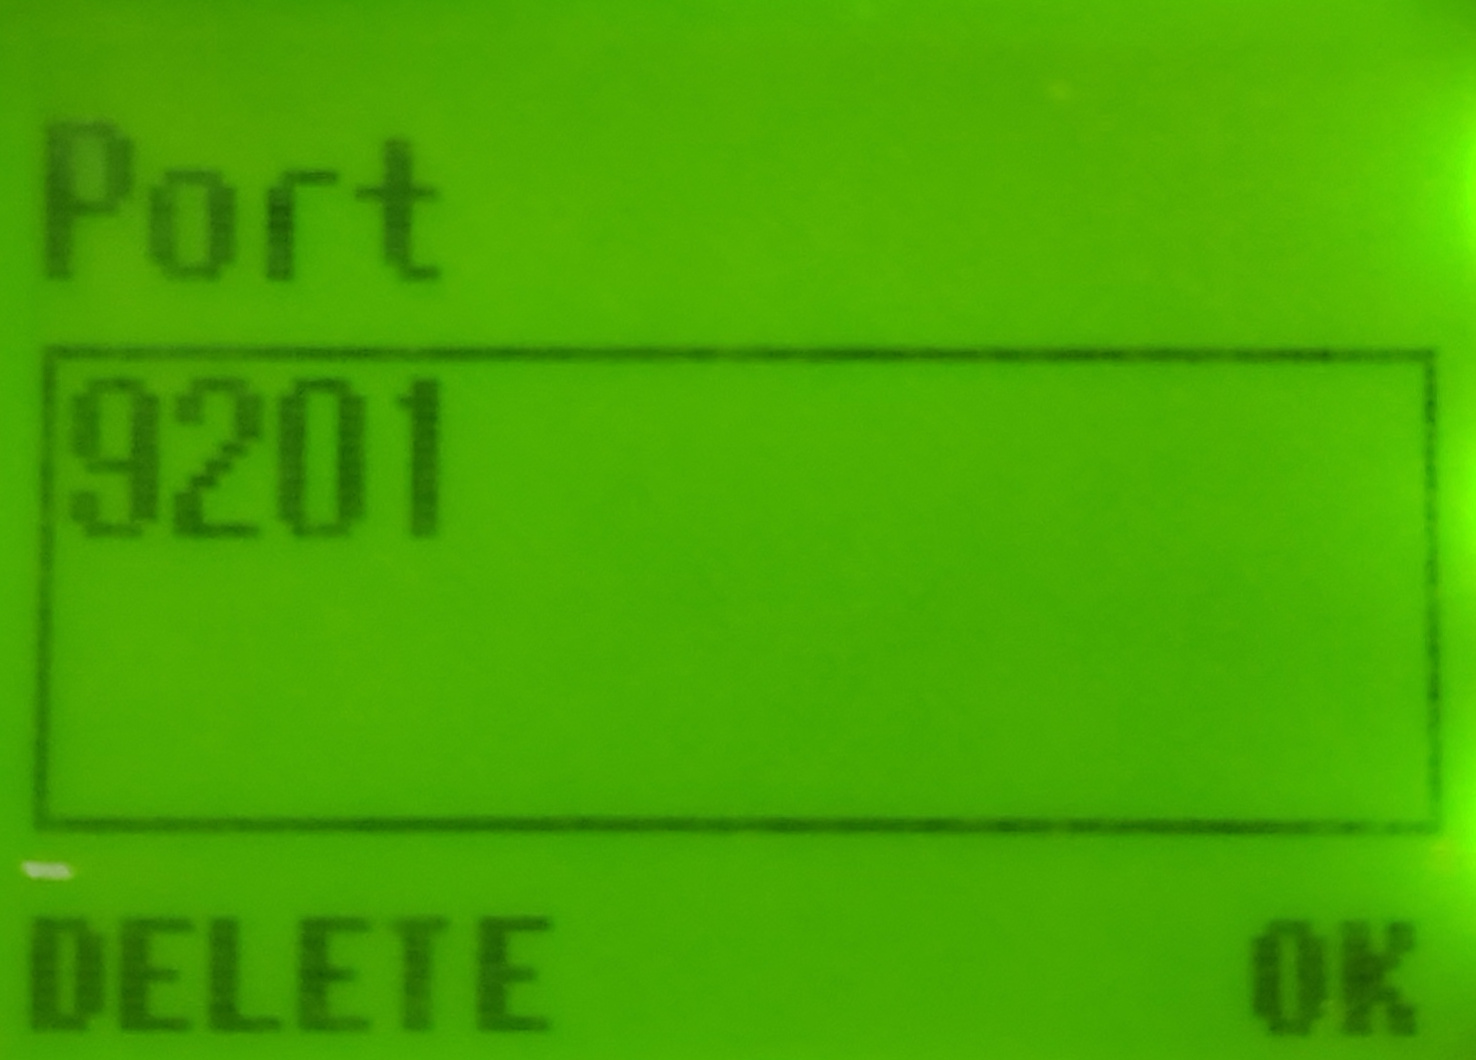
To access from a real phone you need to open public access to the gateway by forwarding port 9201 in the router using the UDP protocol (the gateway provides its functions via UDP on ports 9200-9208, but phones, as a rule, use port 9201 and this value cannot be changed on some phones).Setting up forwarding depends on the specific router, so you need to clarify this point in the router help.

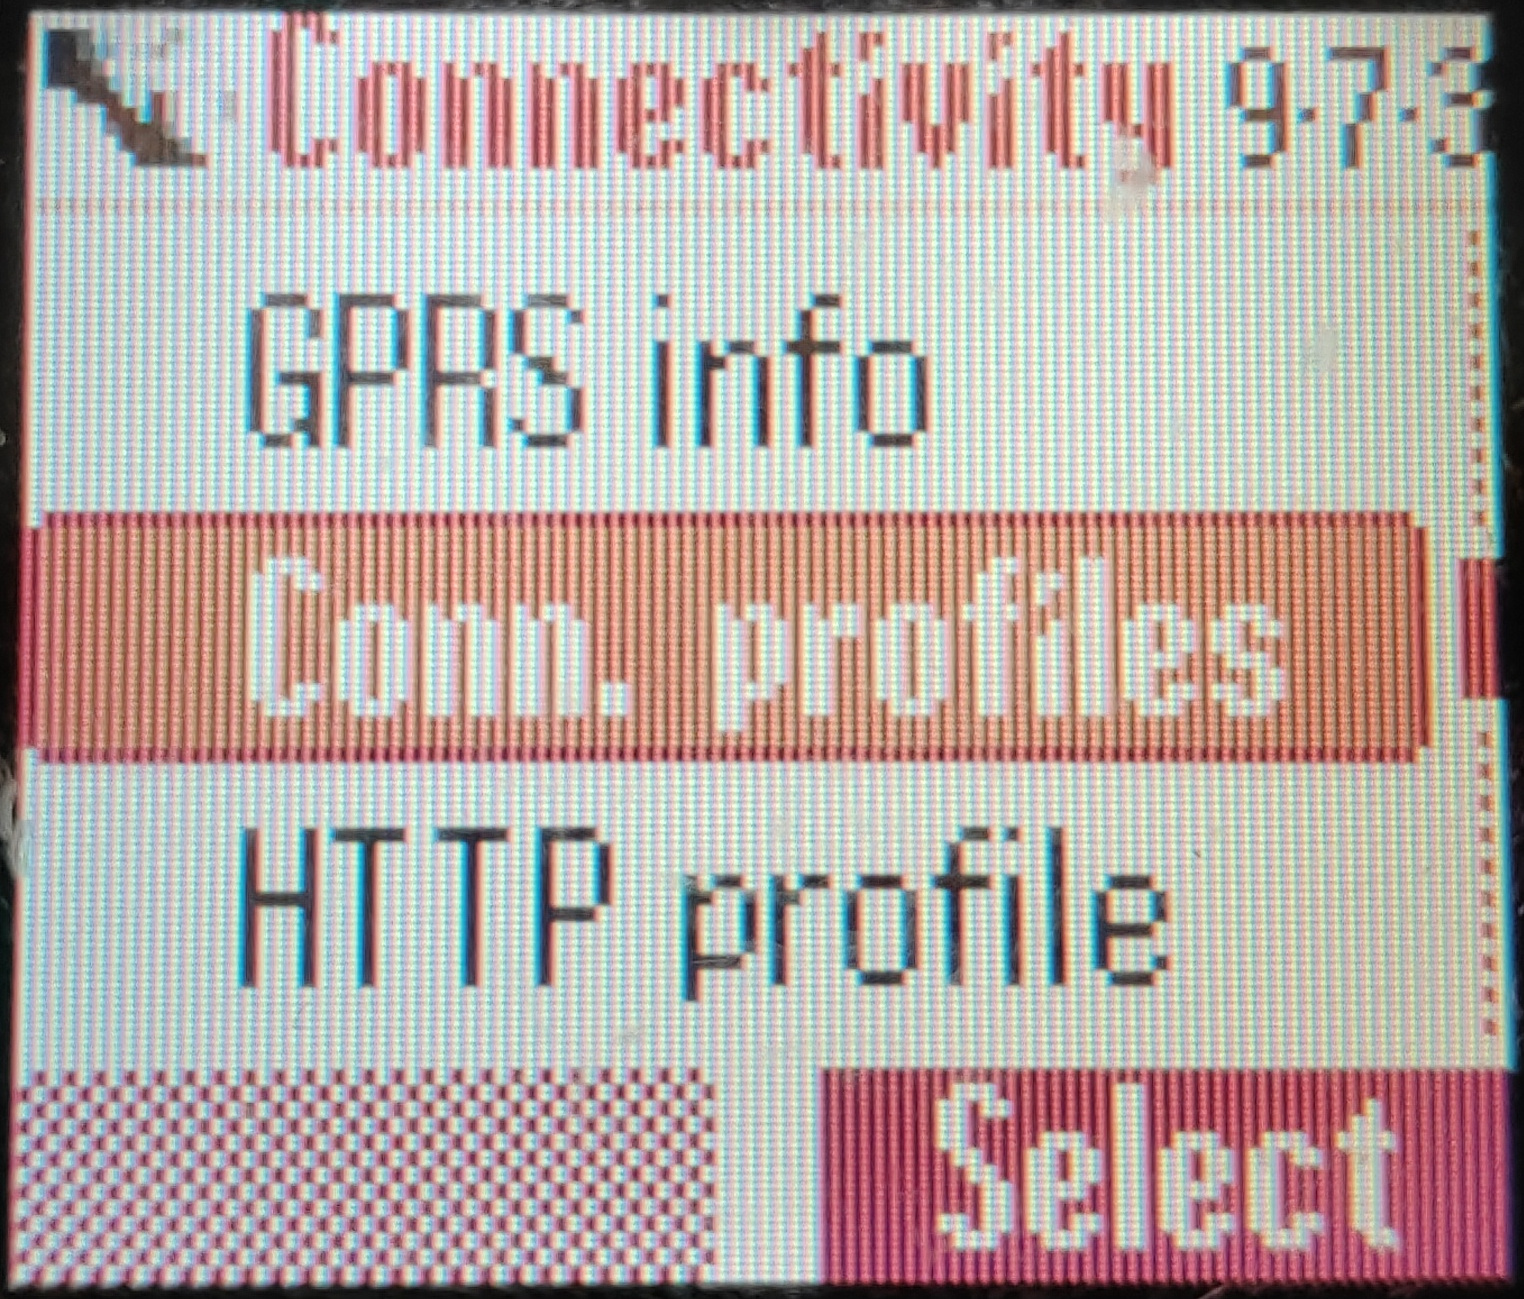
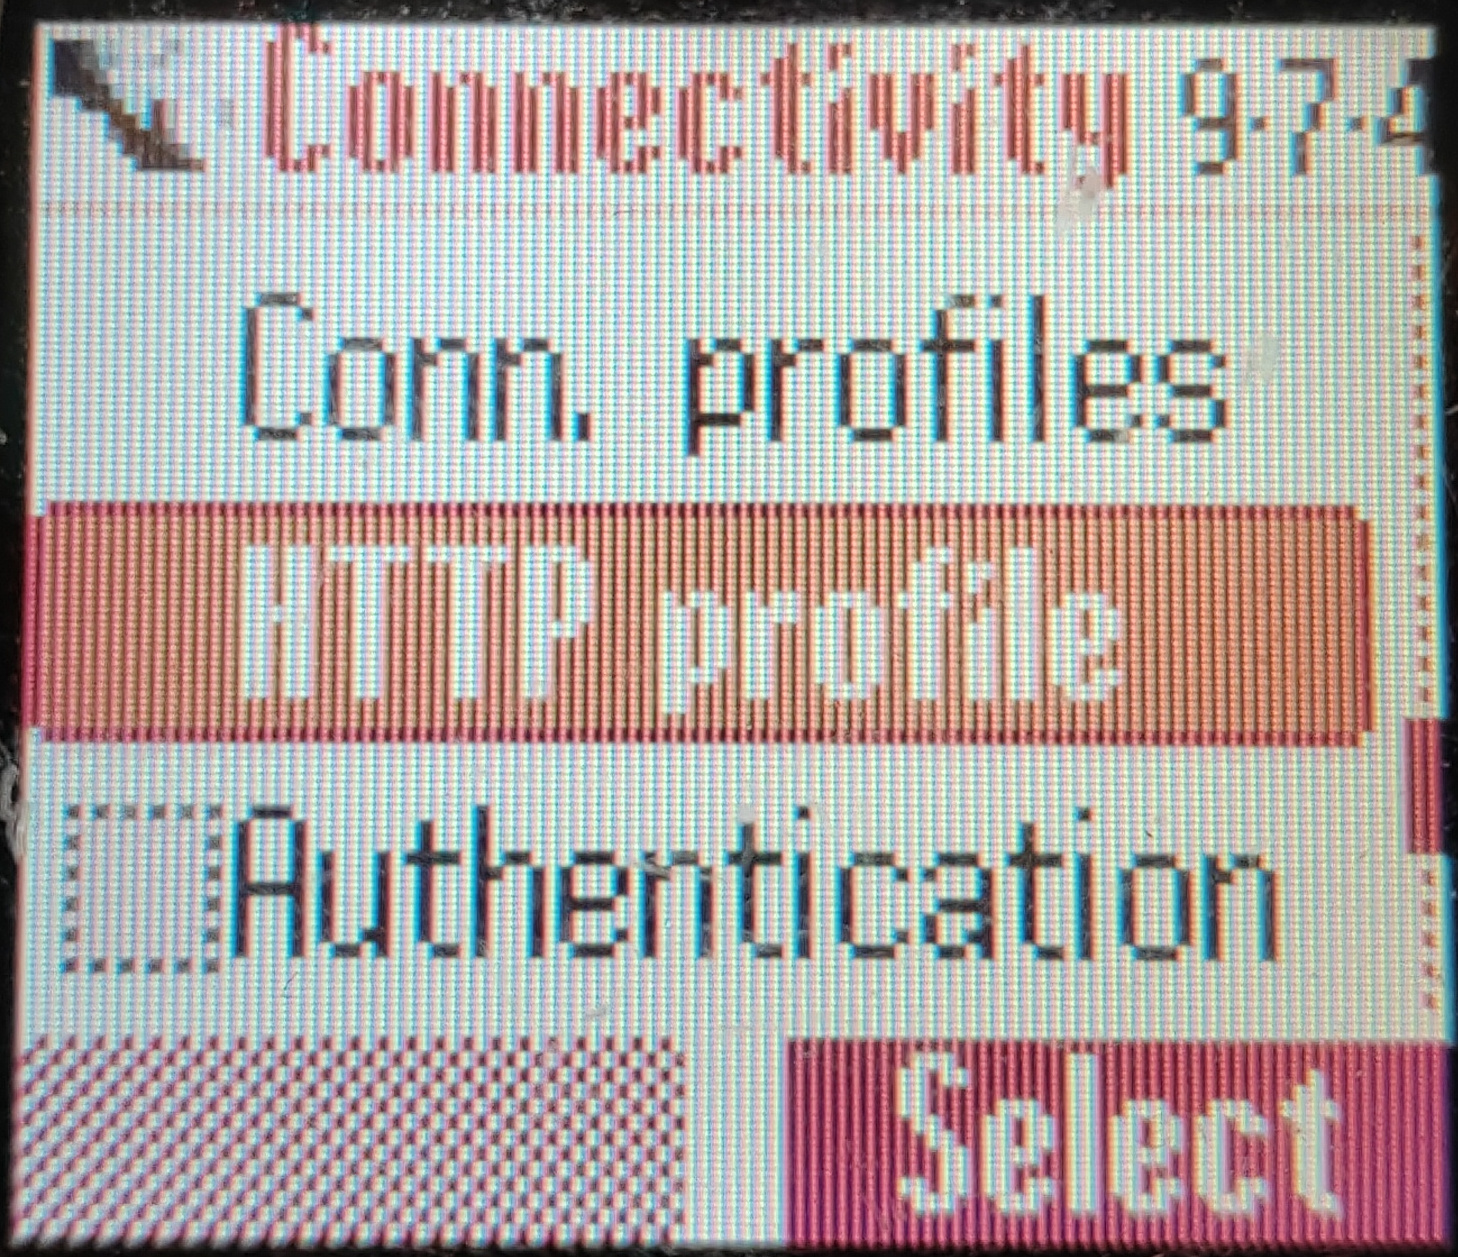
7. Setting up a profile and accessing WAP on a real phone with GPRS
A running WAP gateway is sufficient to access WAP on phones with GPRS (however not sufficient for CSD, but about that later). So you can start configuring WAP profile.I will try to give the most general definition, since each phone has its own browser and the WAP profile settings look different.
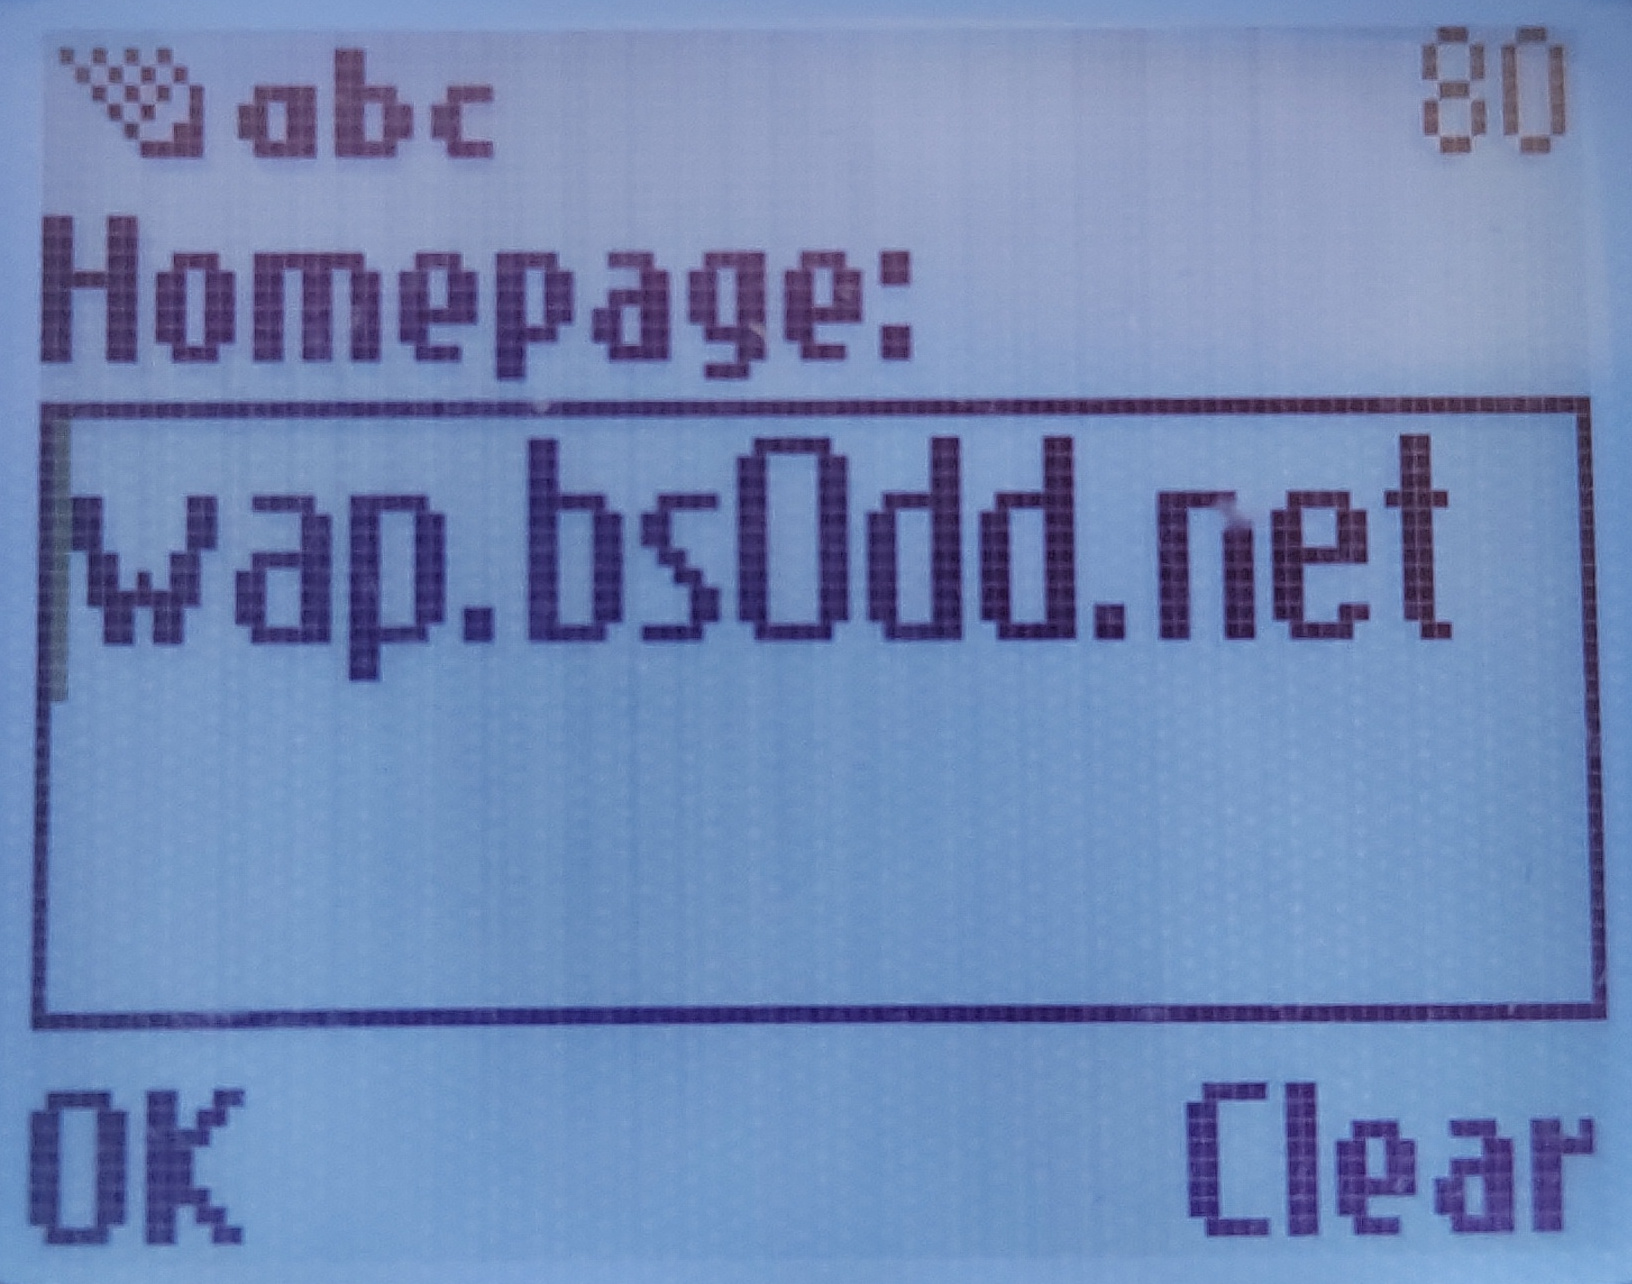
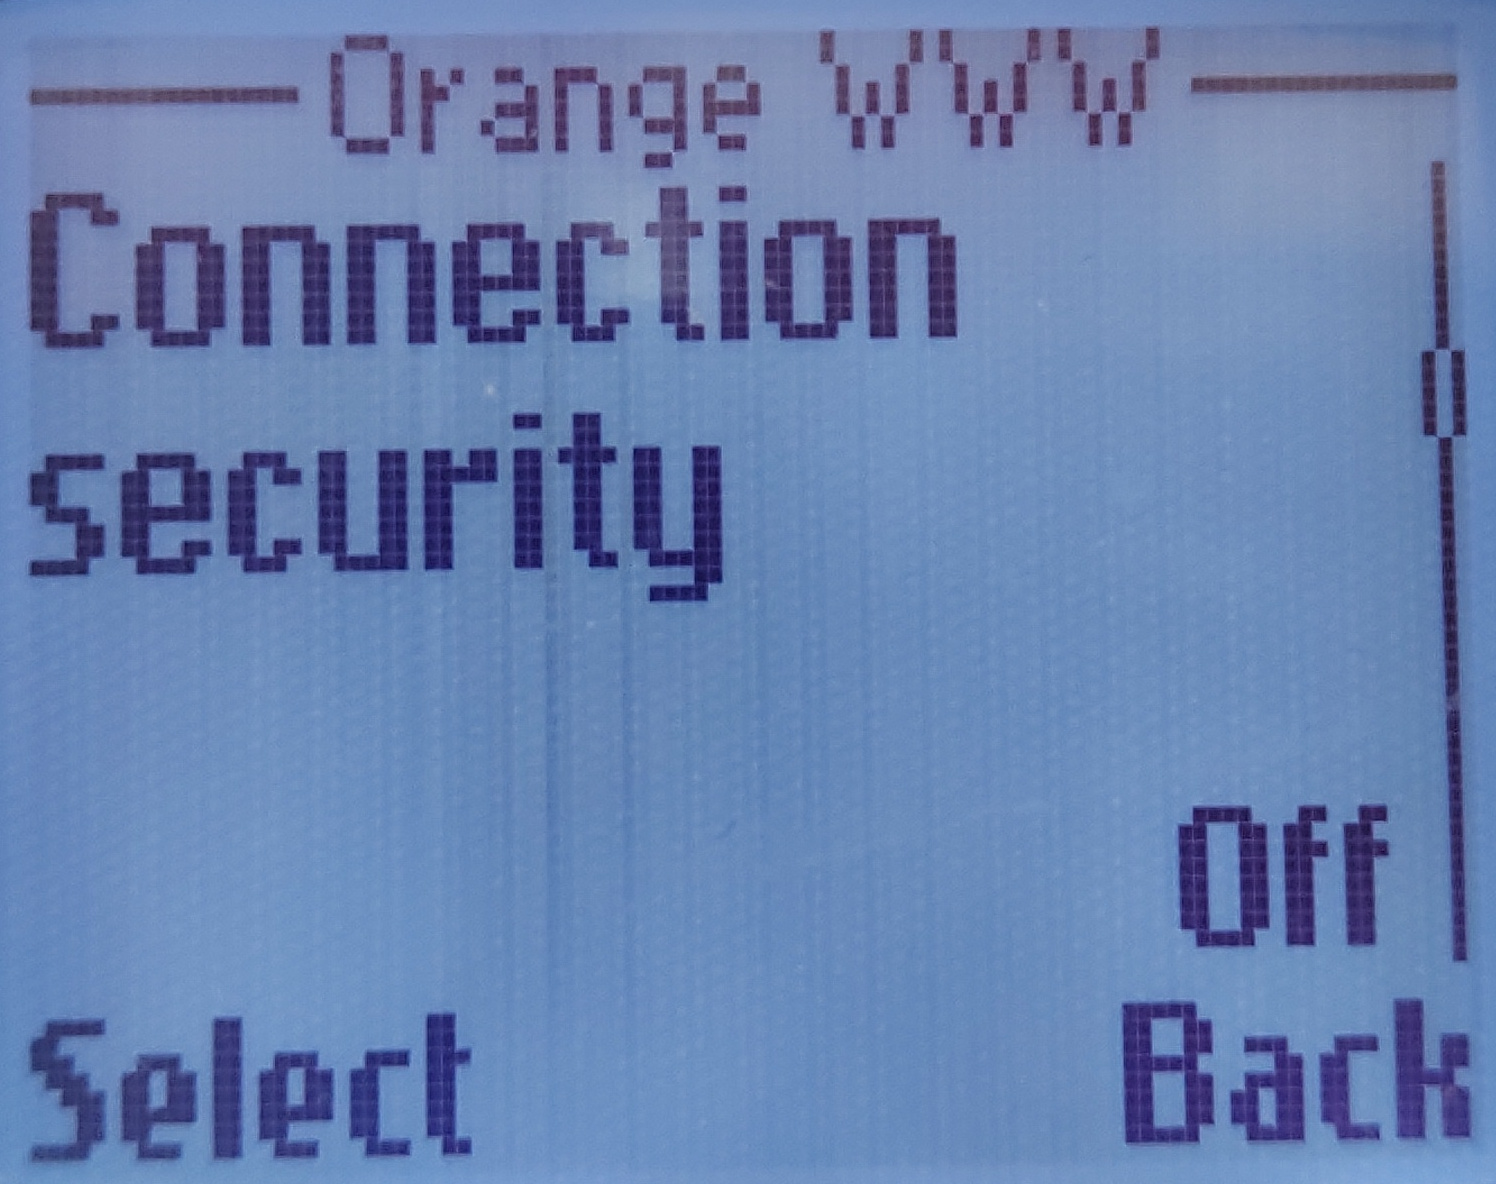
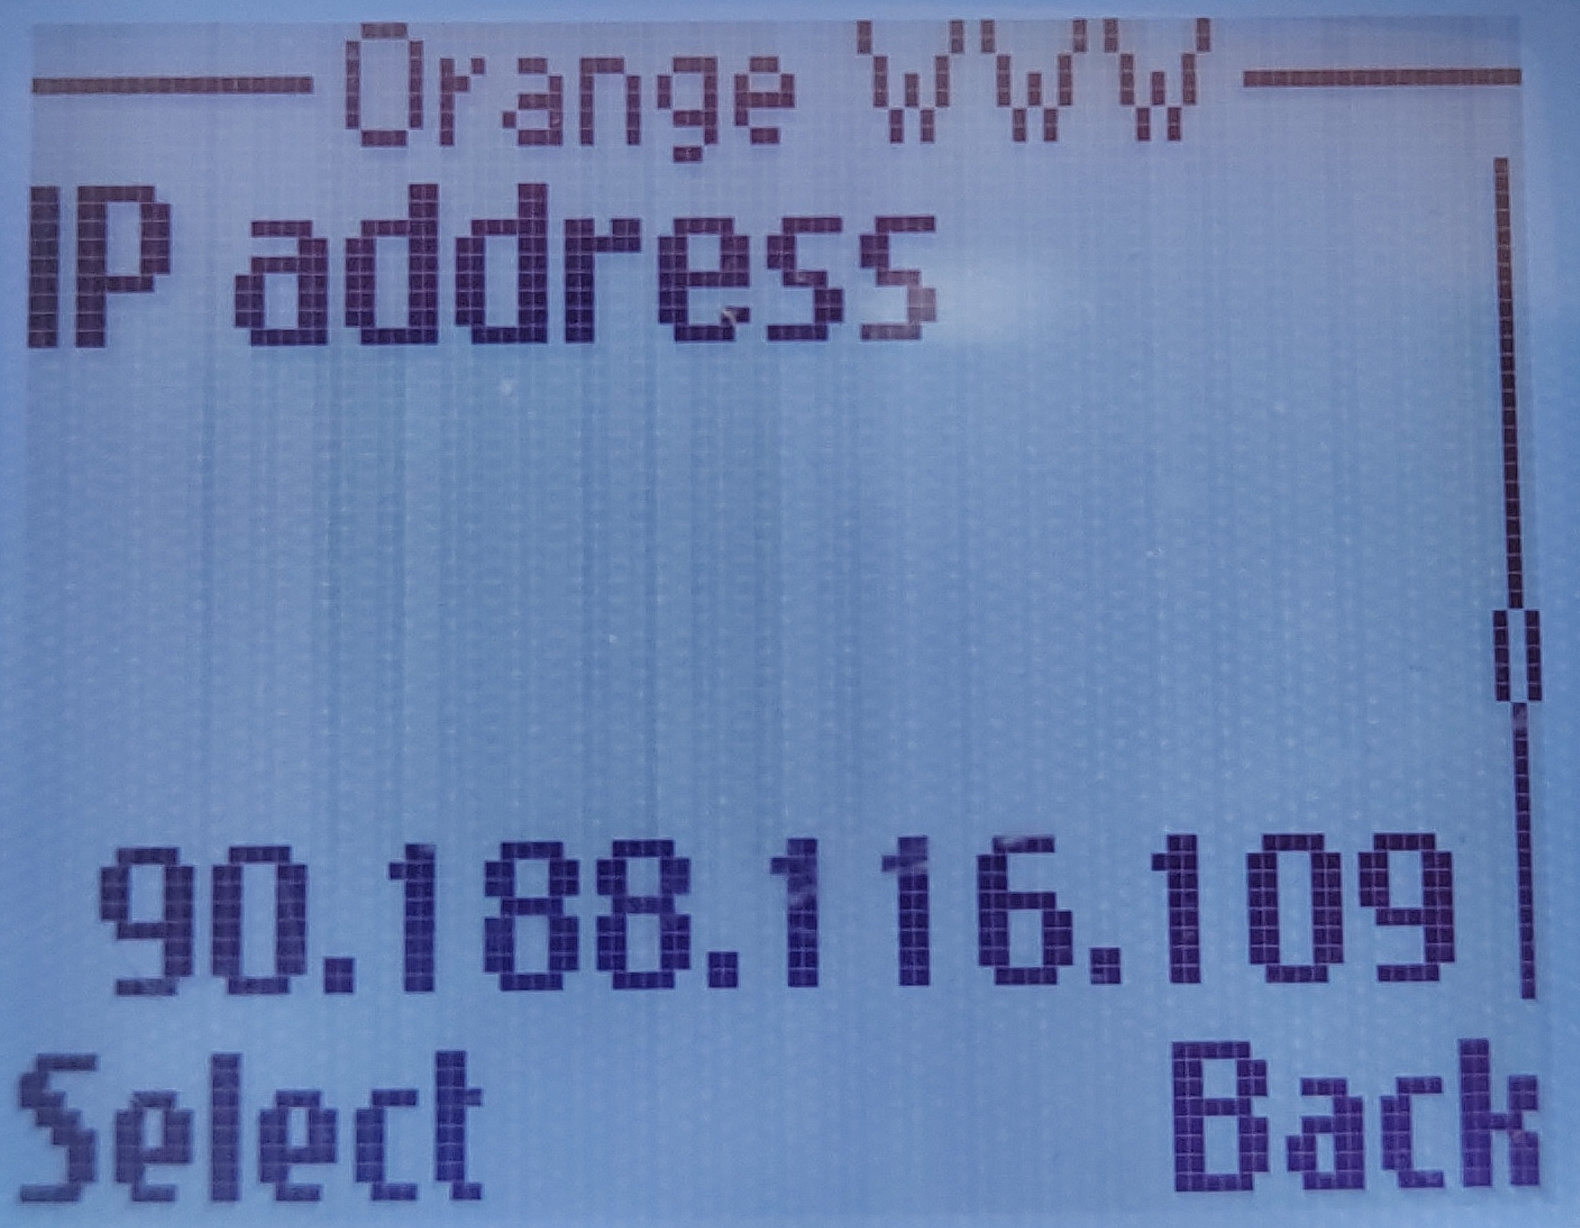
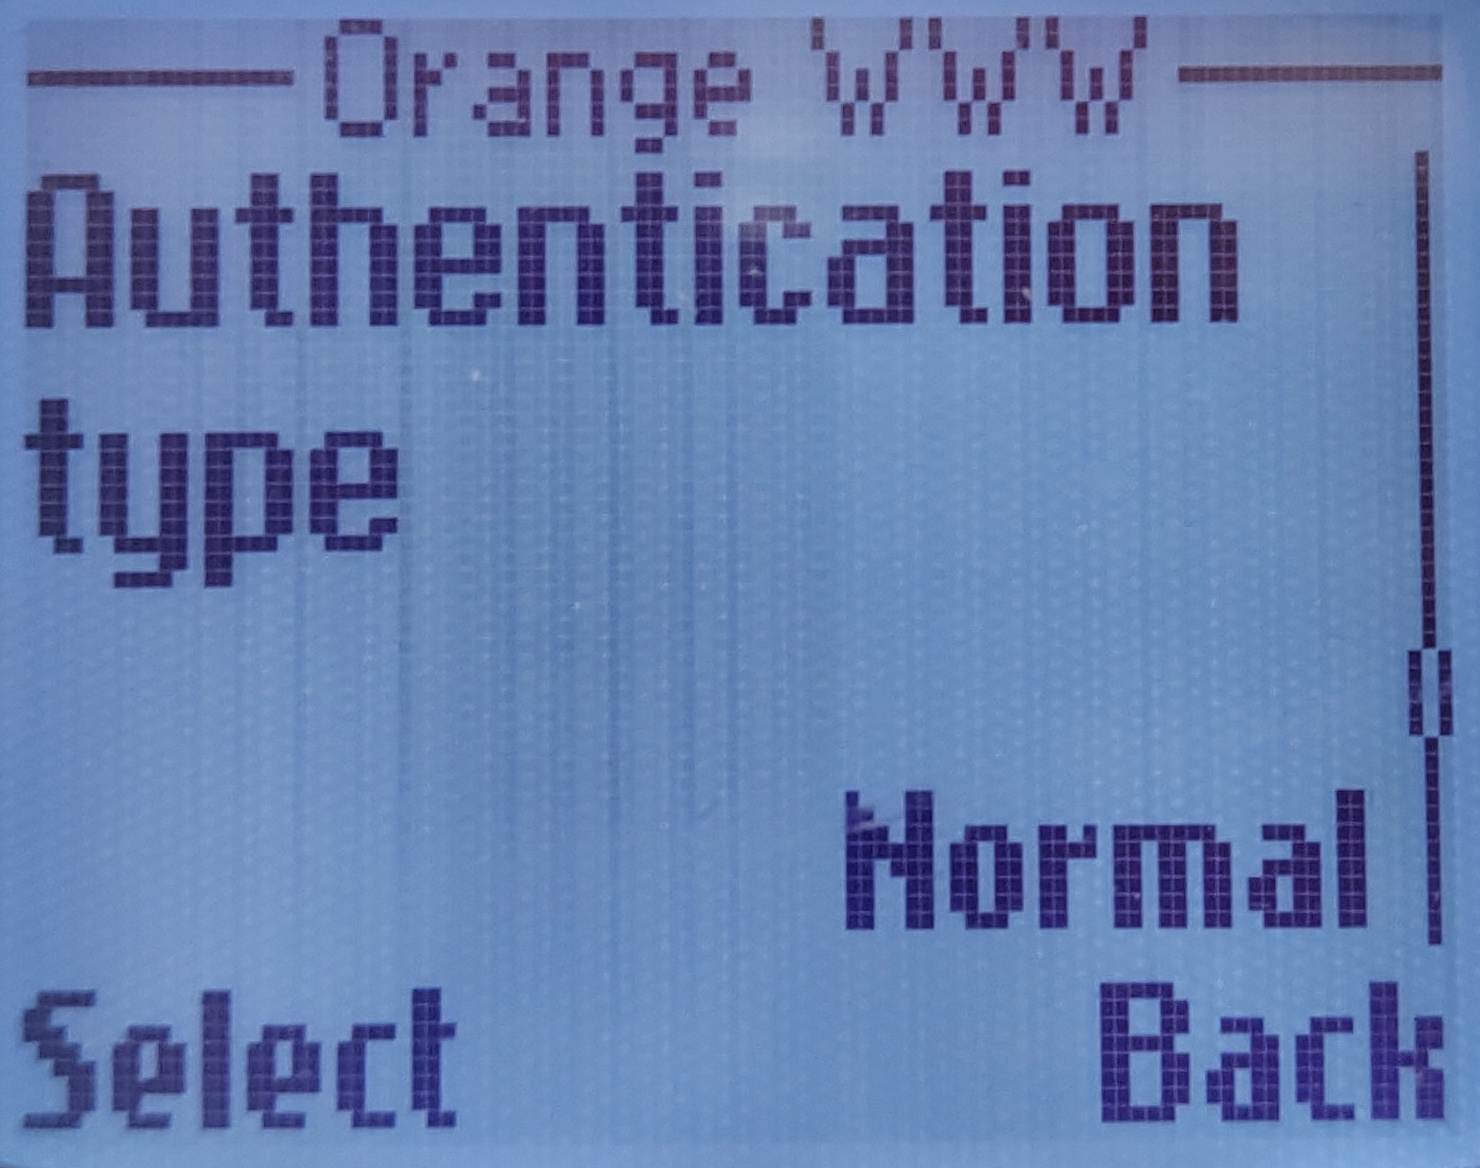
In total, the profile settings should be as follows:
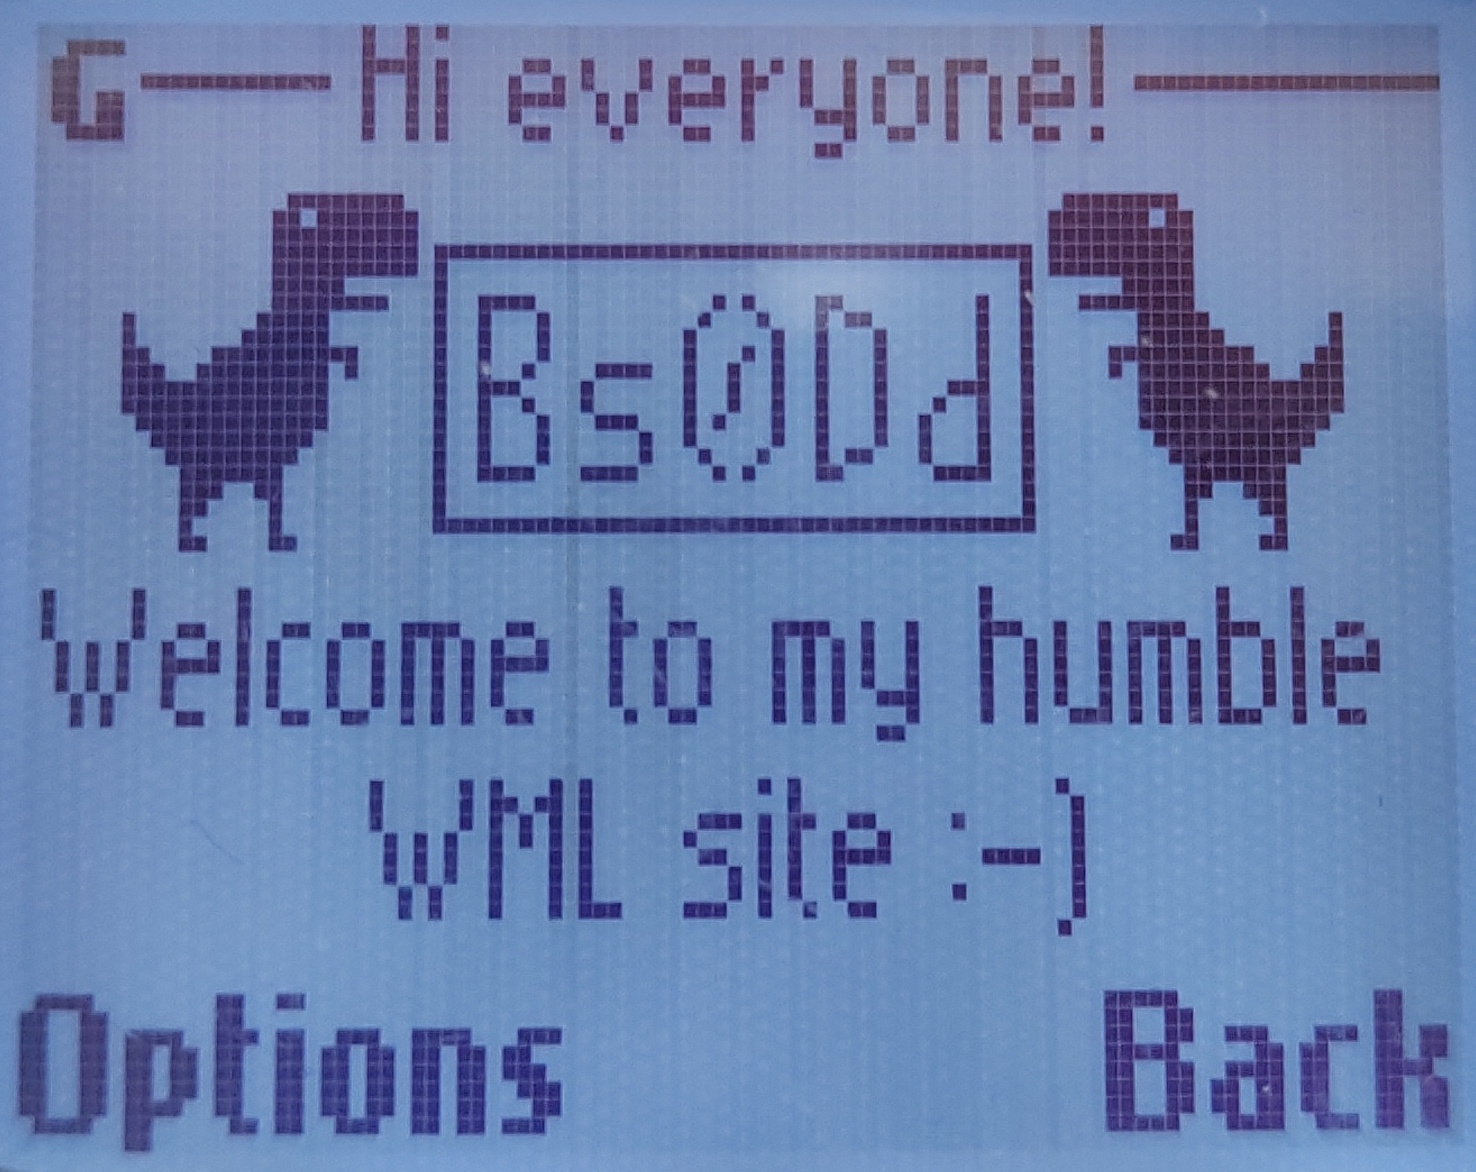
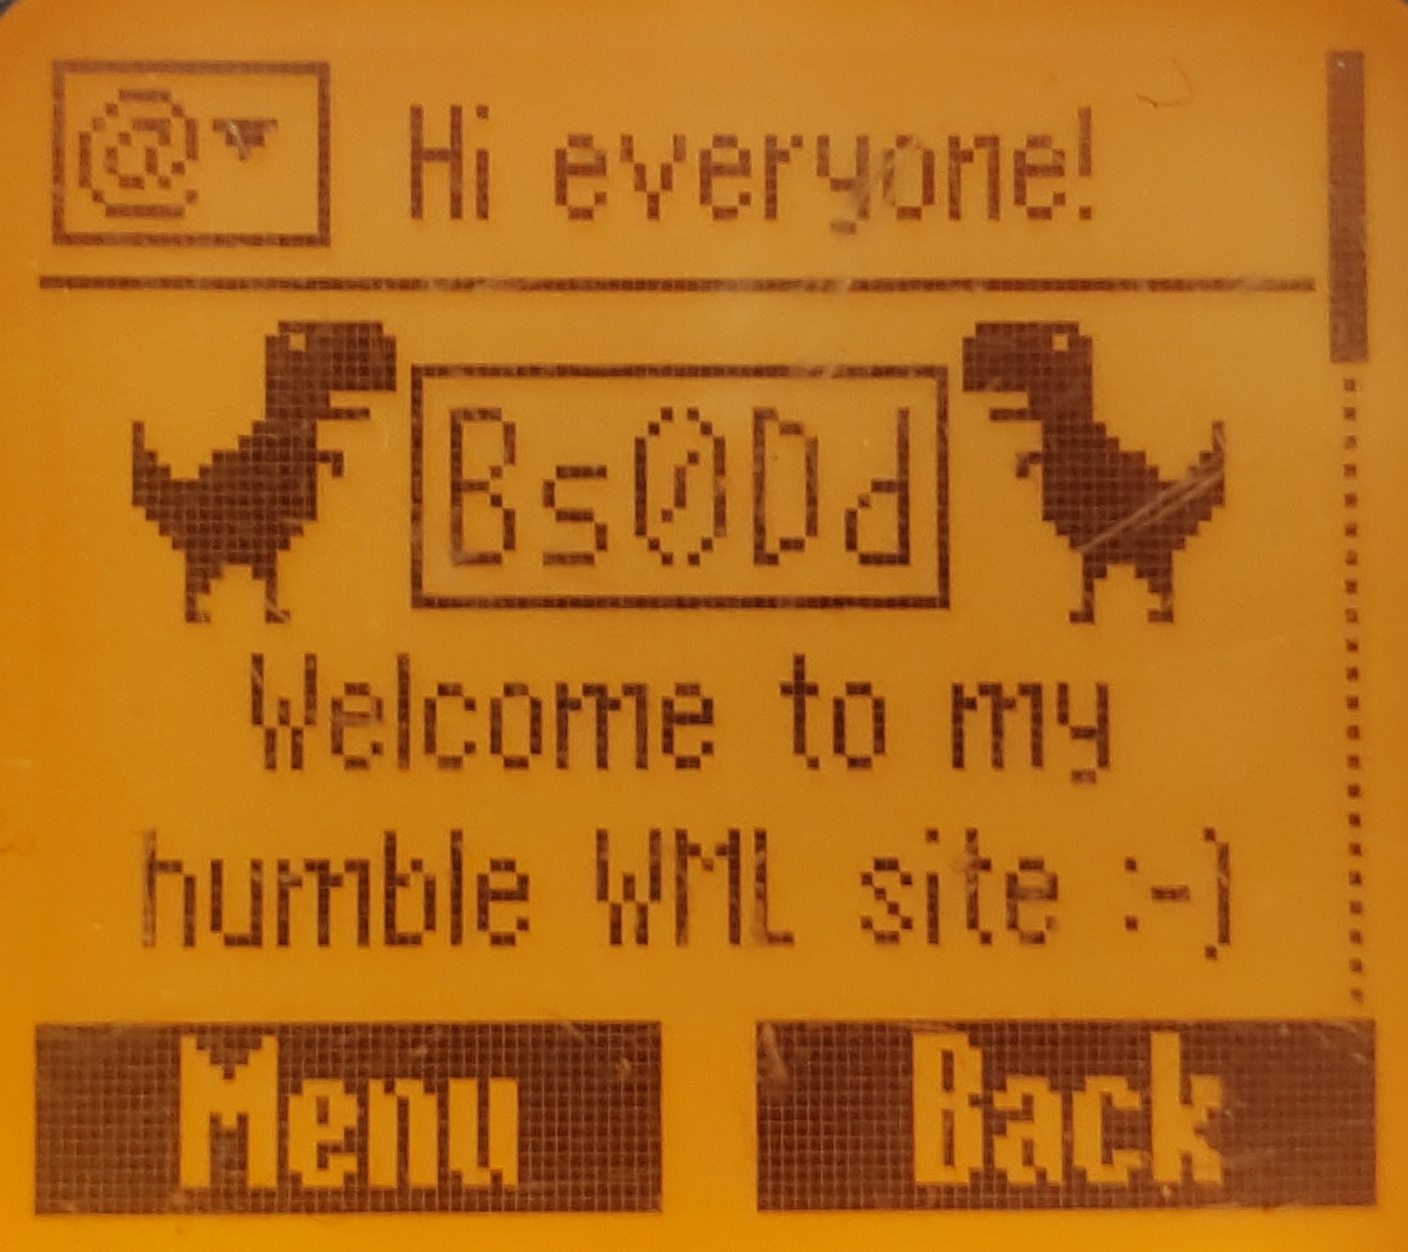
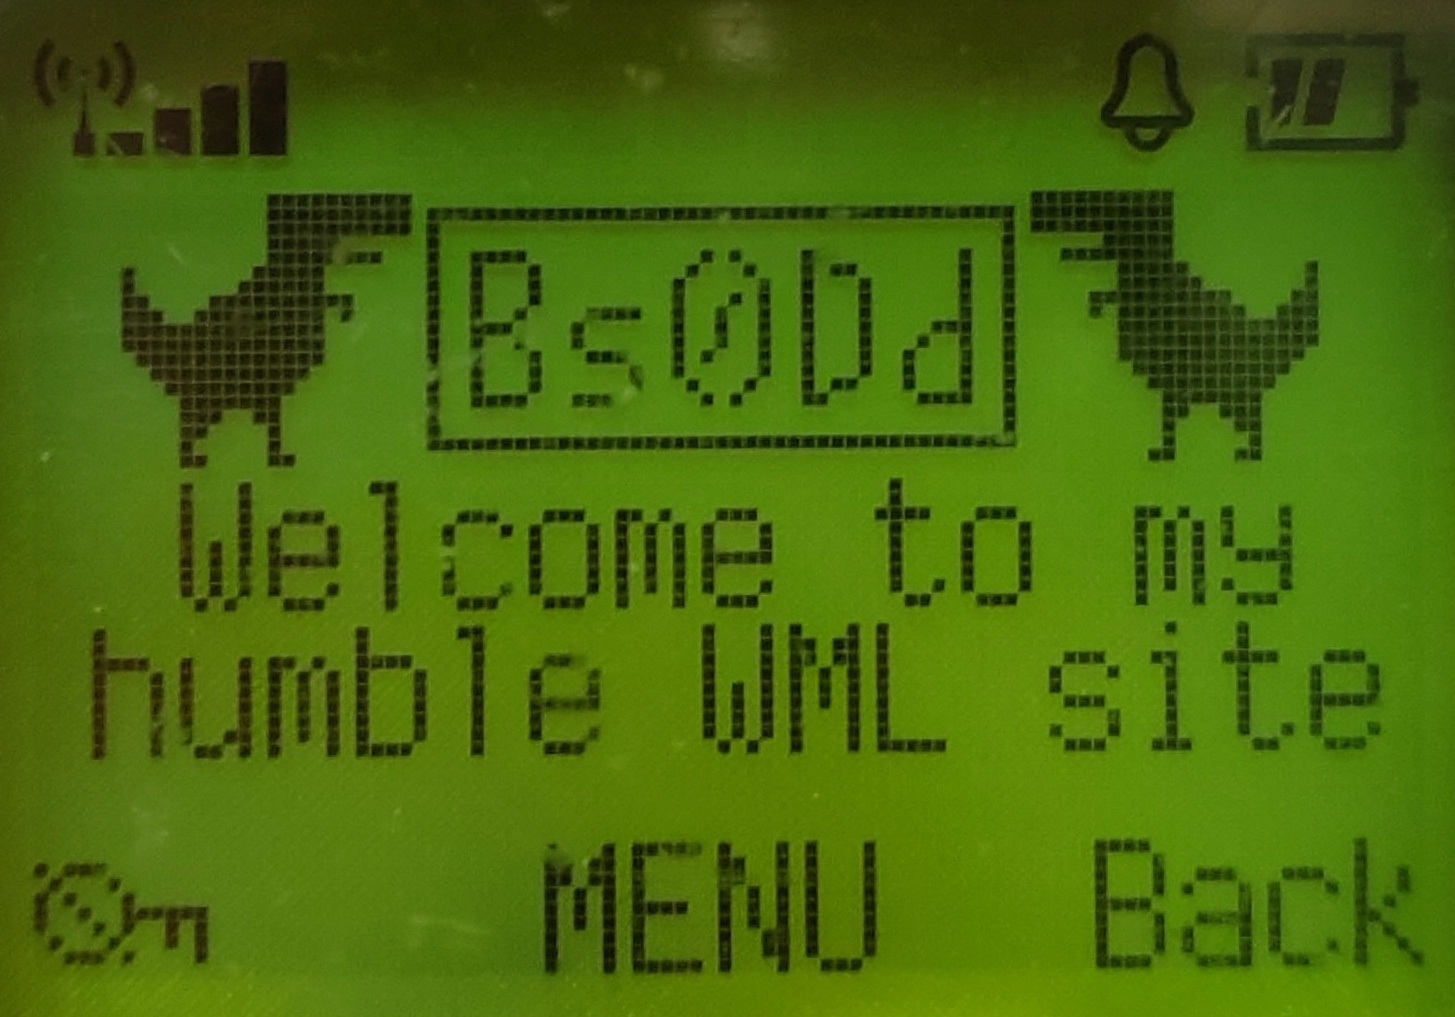
- Homepage: any WAP site with WML pages, for example wap.bs0dd.net
- Session mode (relevant for Nokia): permanent
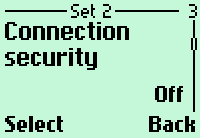
- Connection security: no
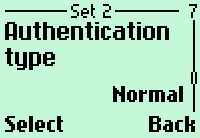
- Authentication/authorization type: normal/without protection
- Login type: automatic
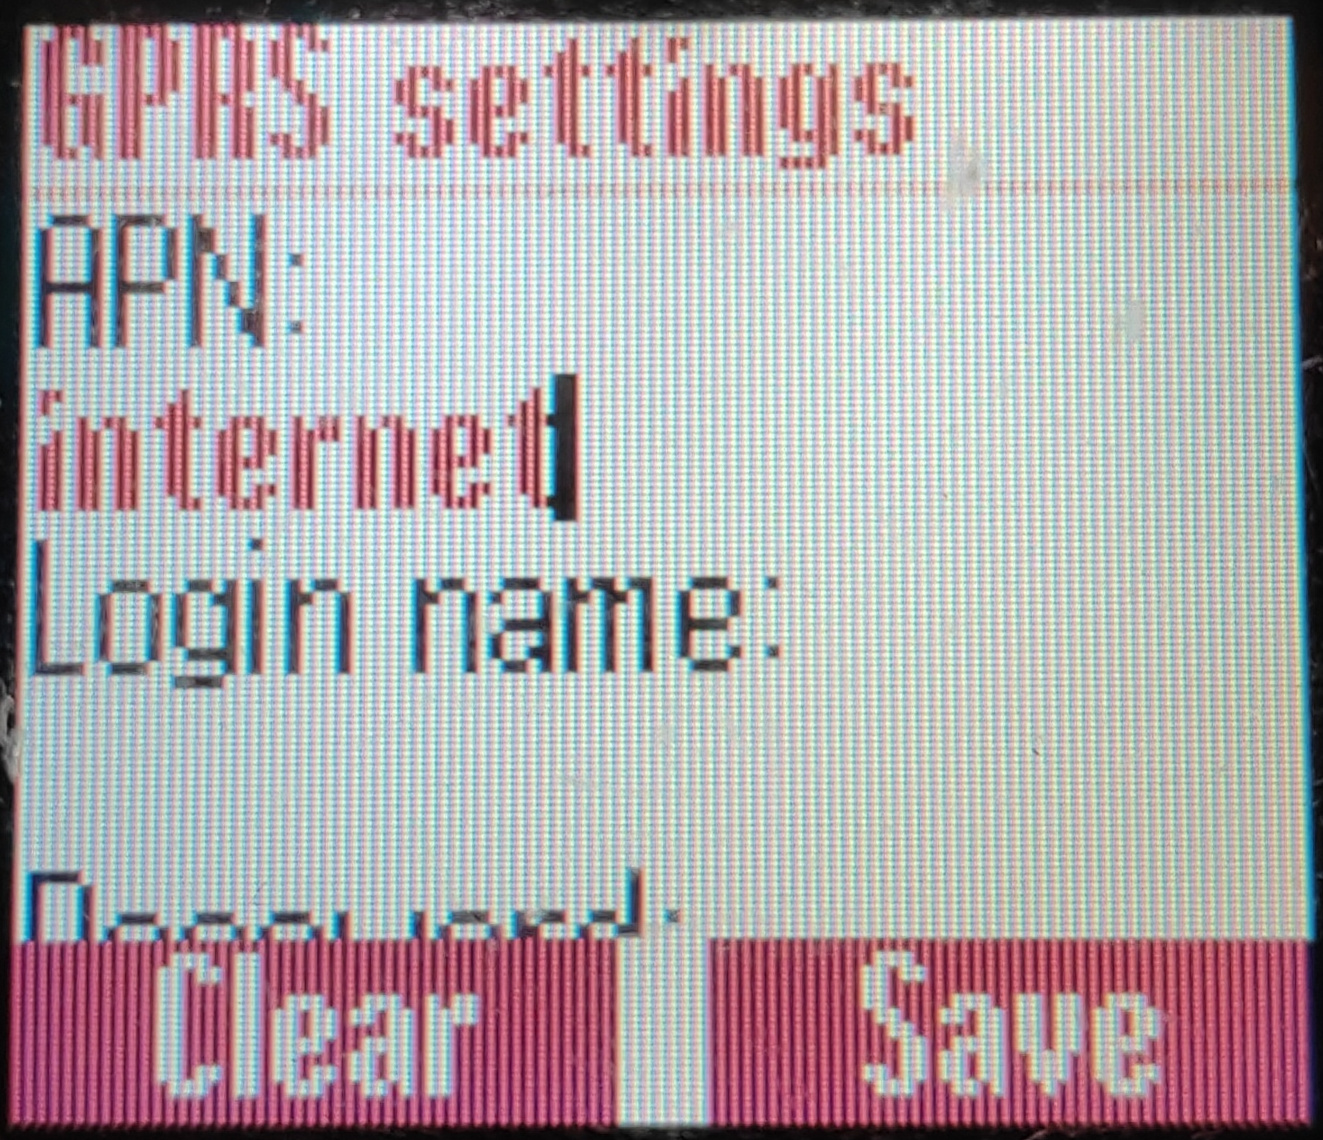
- Access point (APN): *check with your operator*
- Login: *check with your operator*
- Password: *check with your operator*
- IP address (protocol/gateway): *your or public gateway address*
- Port (if required): 9201

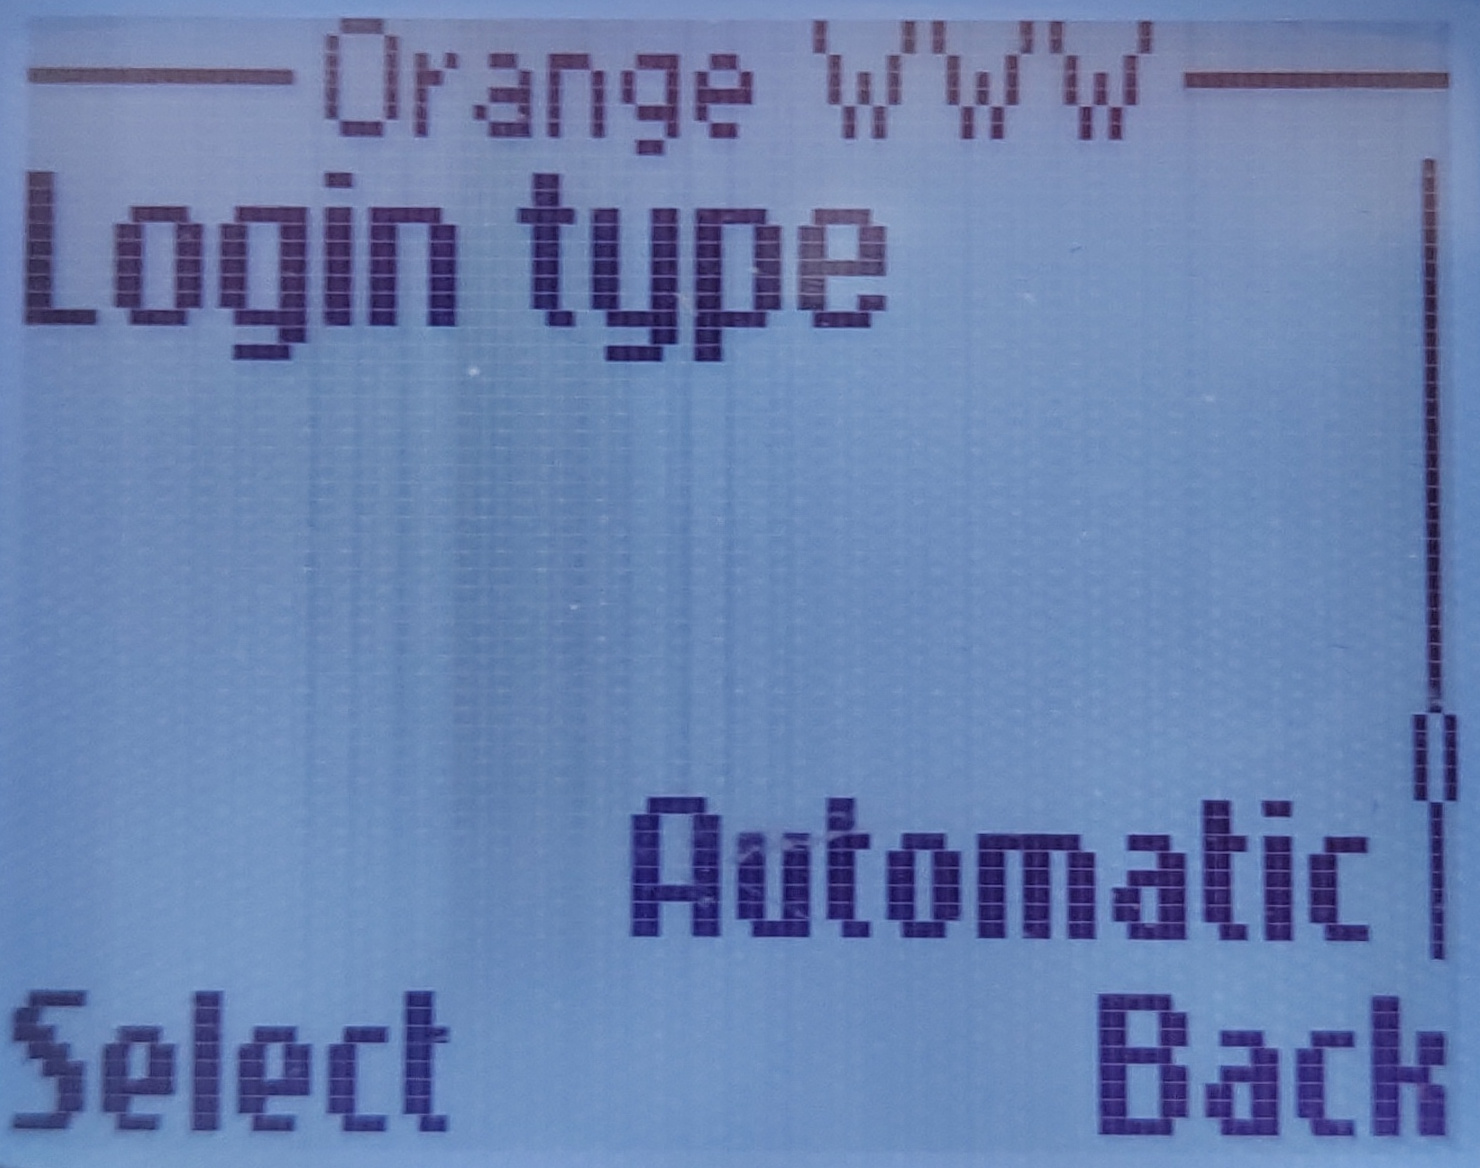
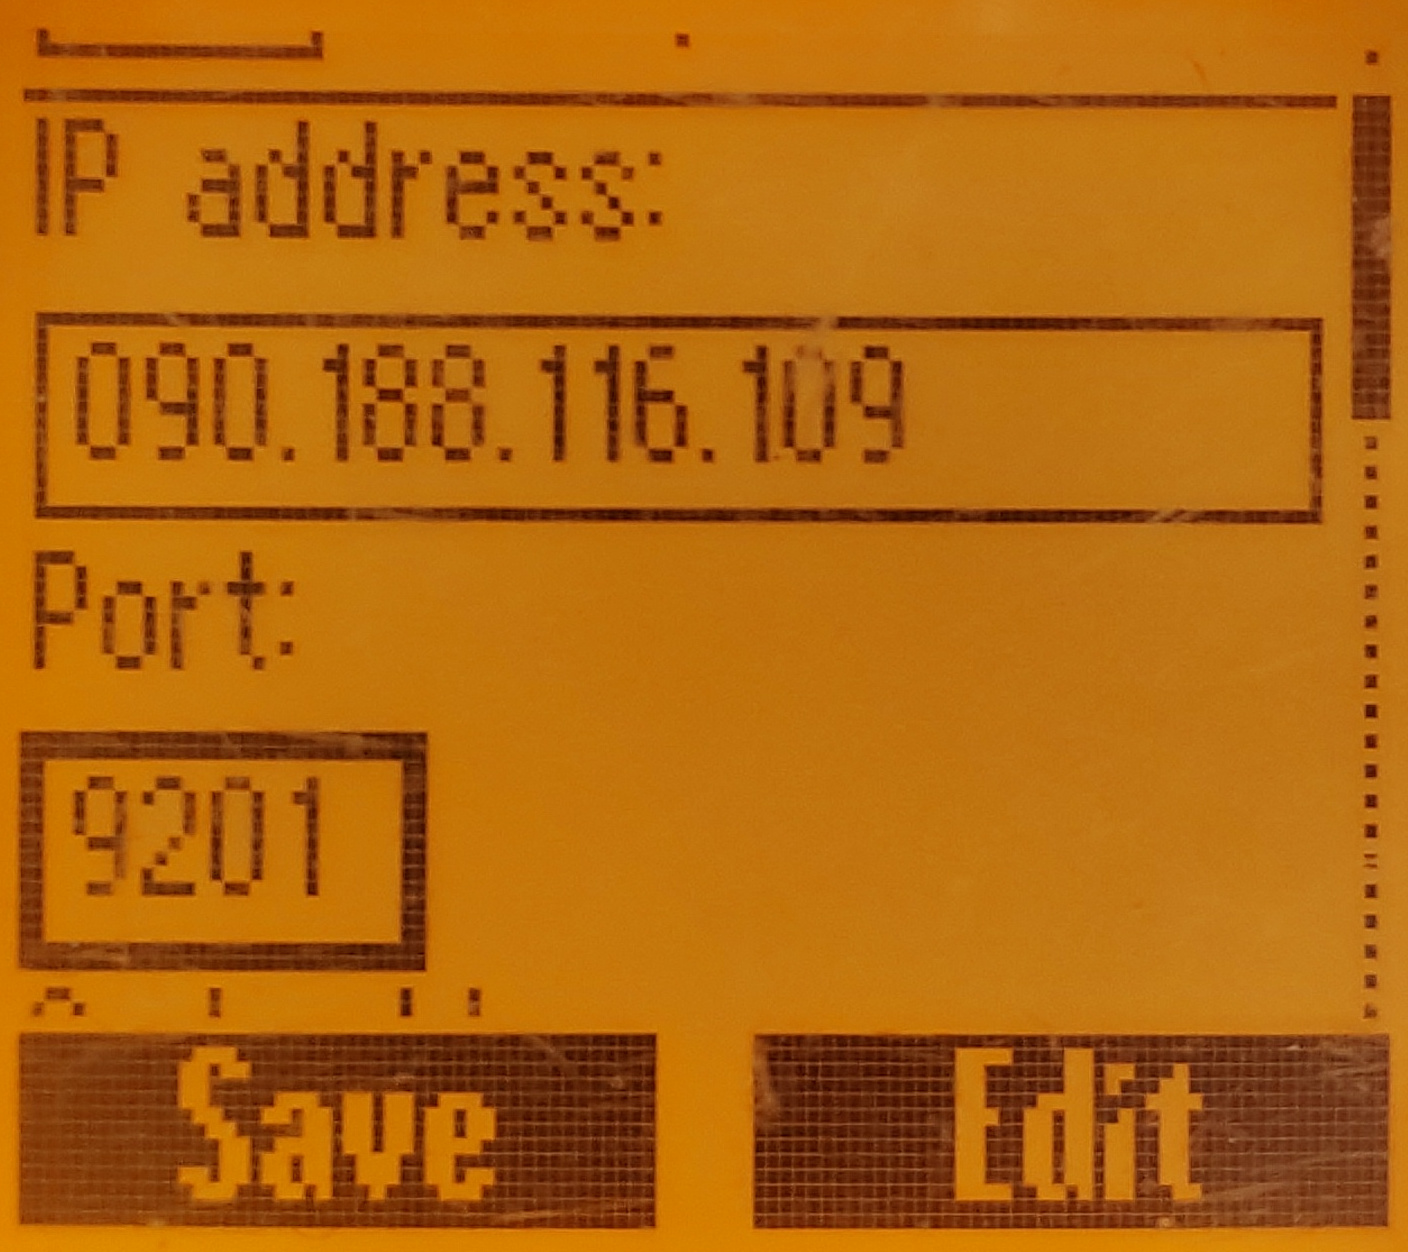
If the gateway is working, port forwarding is enabled and the profile is configured correctly - the page should open.


8. Attention Siemens users (Java download via WAP)
If you get an error when trying to download a JAR application via WAP:
Although the WAP profile is configured correctly and the pages are opening - make sure that you have configured the Java profile.
The phone, for some reason, downloads JAR files through direct HTTP requests to the server, and therefore does not use a gateway and WAP profile.
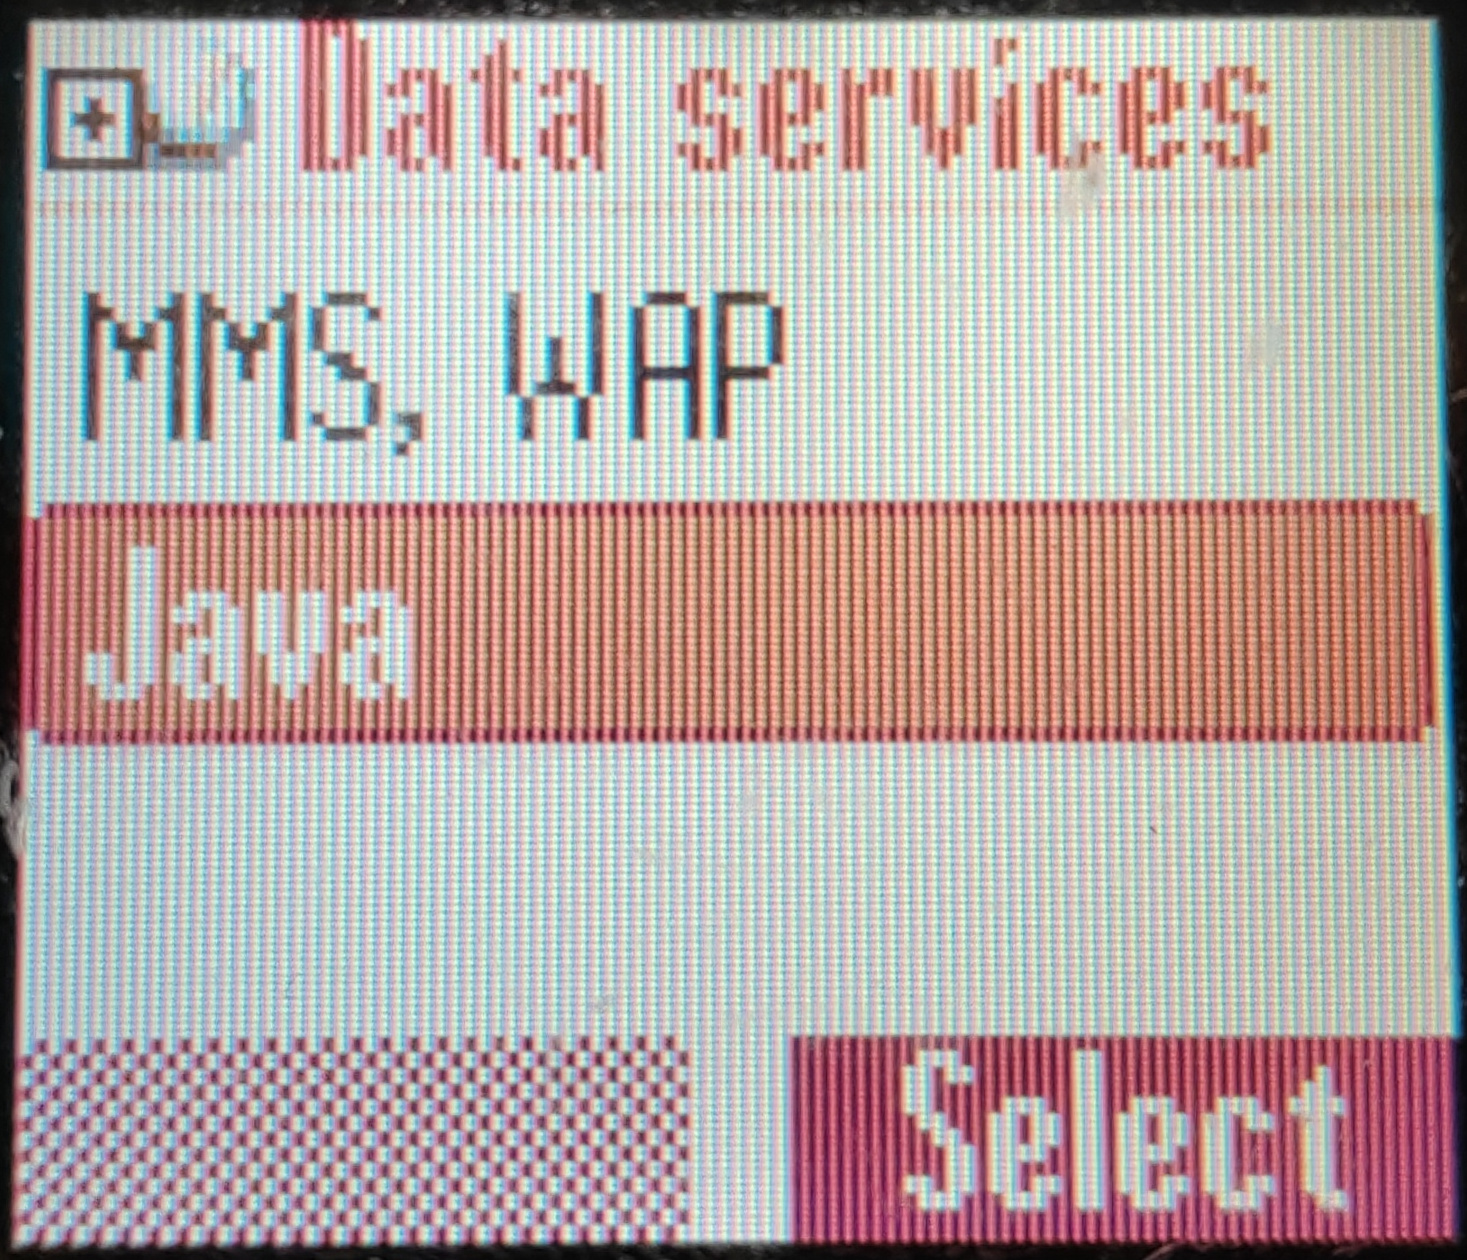

After configuration, make sure that this profile is selected as the default profile for the HTTP protocol.

The download should now work correctly.
9. Setting up Dial-in service: preparation
Setting up Dial-in is much more complex and demanding. In addition to supporting CSD calls at the operator level (this can be easily verified using the method described below), you must have:- Second number, highly desirable from the same operator (haven’t checked on different ones)

- A second phone with CSD support (not all phones accept CSD calls, especially budget ones), preferably 2G.
In general, even a Nokia 5110 can be used as a modem, verified.
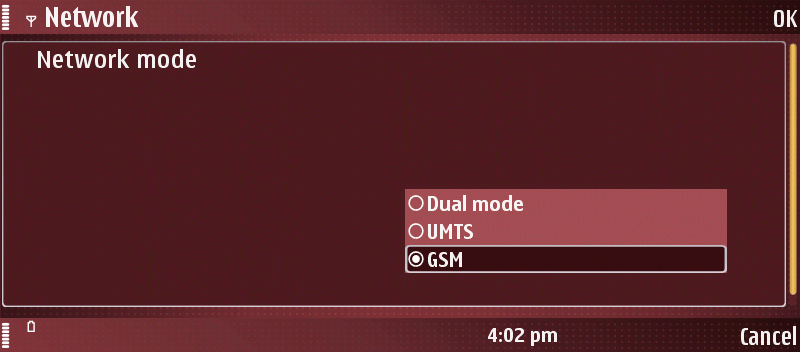
If you still intend to use a 3G phone, it is recommended to switch it to forced 2G mode to avoid problems with receiving CSD calls.
Now you need to make sure that your operator does not restrict CSD calls on its network. The fastest way to check is to create a stub profile in which you specify the WAP home page, connection type (preferably ISDN, but if it doesn’t work, you can check analog), any IP address and your number, which is installed in the GSM modem.

If your phone supports HSCSD (14400 bps), it will allow you to select speed. You can try to select 14400, but even at that time not all operators supported HSCSD, so most likely the call will fail, then set 9600 (regular CSD).
Now we try to go to the home page. The phone will try to make a call with data transfer (data call), if there are no restrictions on the operator’s side, the modem phone should ring, while with a note that this is a data call. If this happens, you are very lucky, you can continue setting up the Dial-in service.
Well, if the call fails, then unfortunately there is something wrong on the operator’s side, you will have to clarify this issue with him(as I wrote at the beginning of the note).
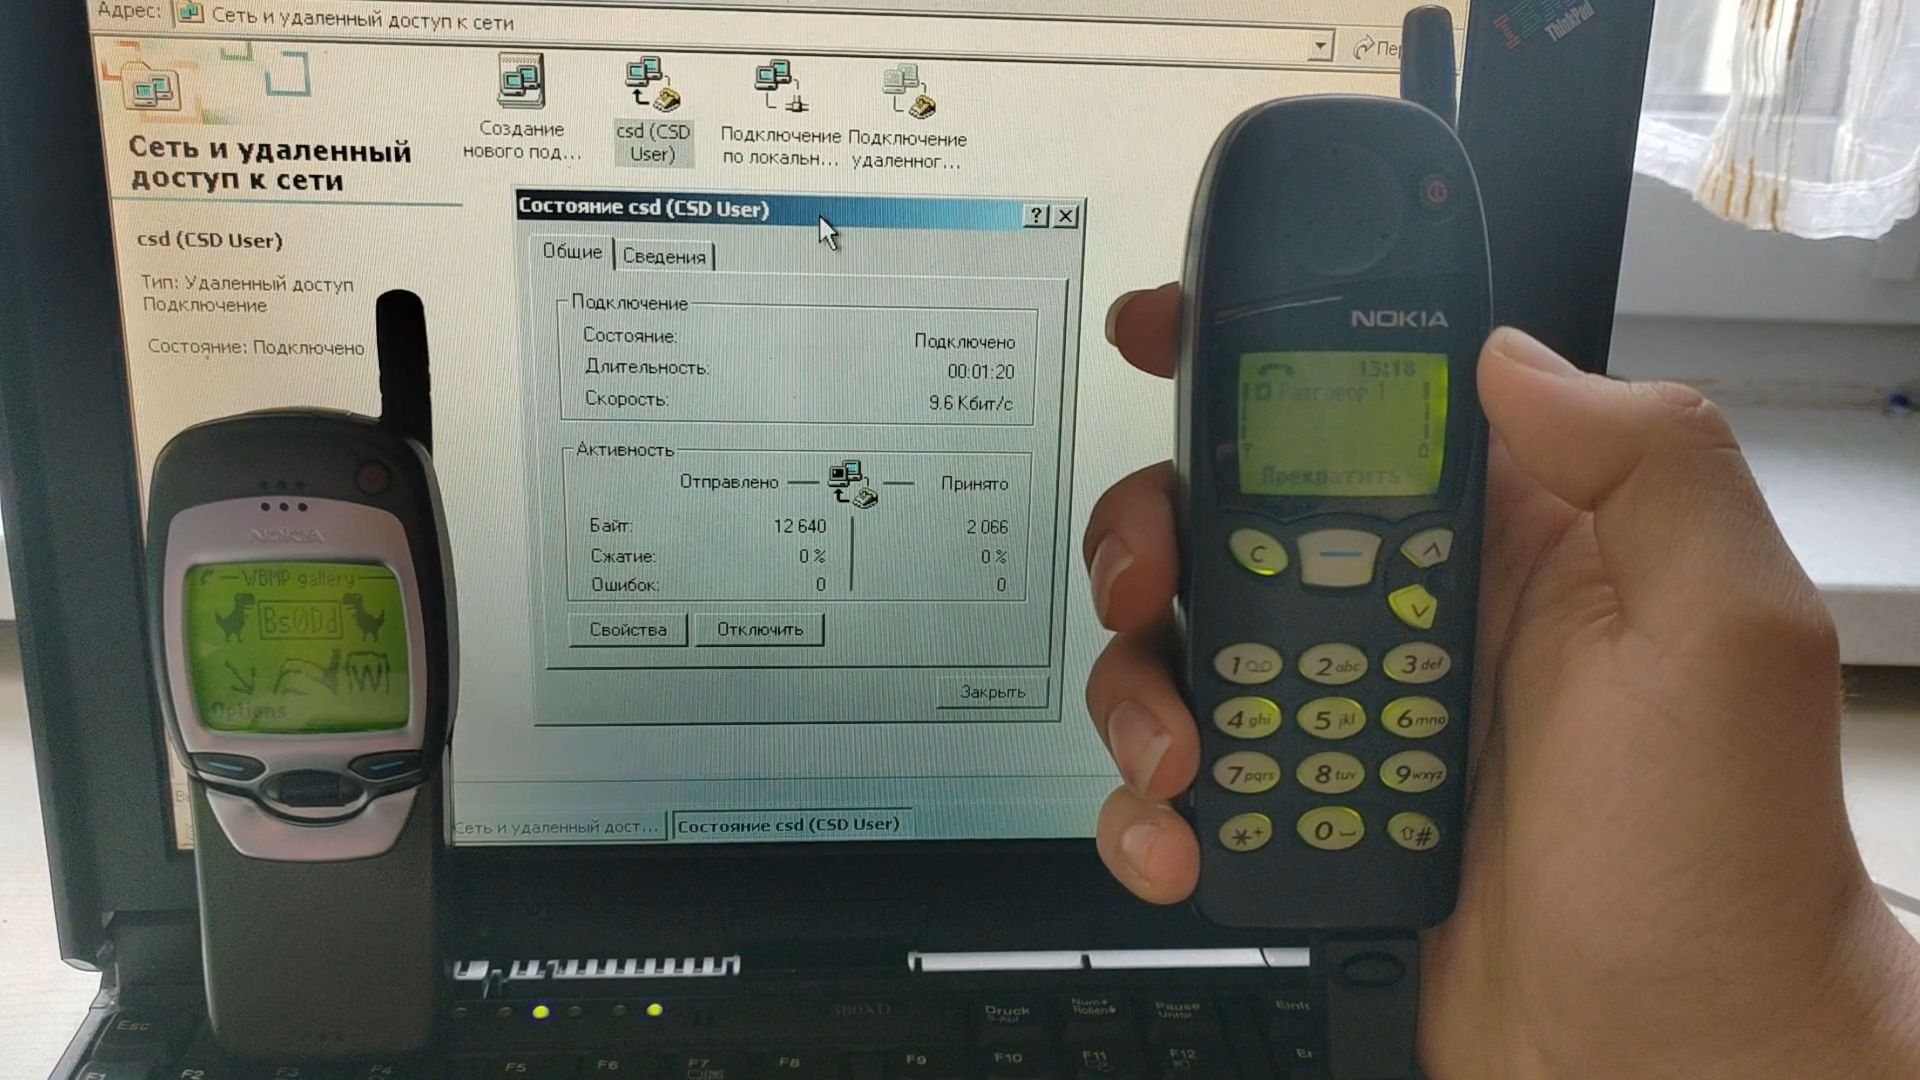
10. Setting up Dial-in service: Windows
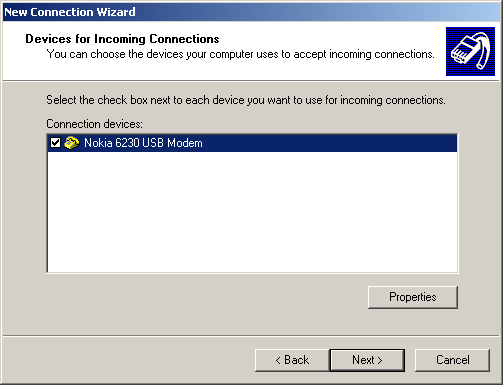
First of all, you need to install a driver for your phone.In my case, this is a driver for Nokia phones.

Now connect the phone. When installing drivers, a modem will appear among the phone functions. That's what we need.

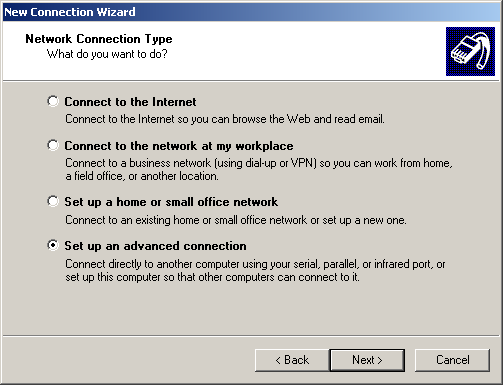
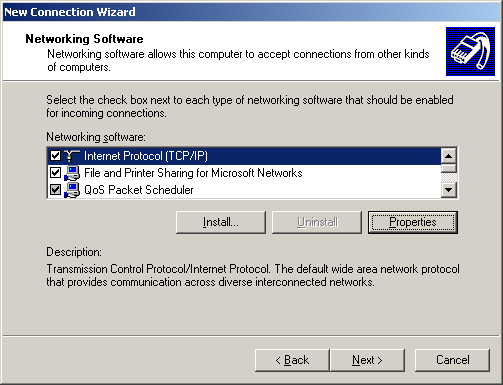
Open "Network connections" -> "Create a new connection".

"Set up an advanced connection" -> "Accept incoming connections" -> Choosing modem -> "Do not allow virtual private connections".


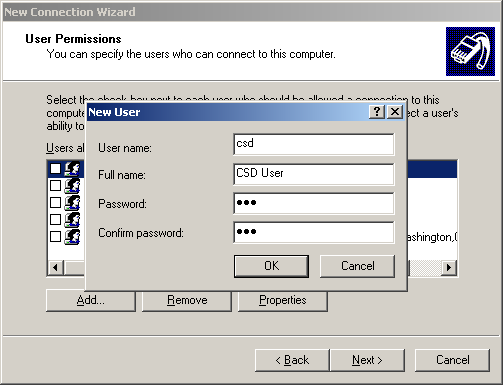
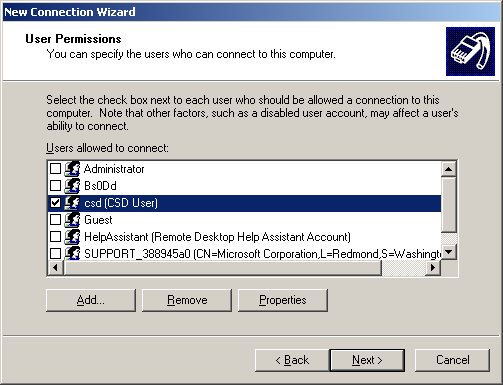
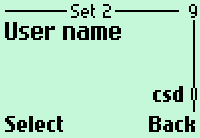
Now we create a user whose data (login and password) will be used for authorization of the caller in the system.
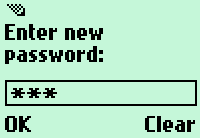
I will create a user "csd" with a password "123".

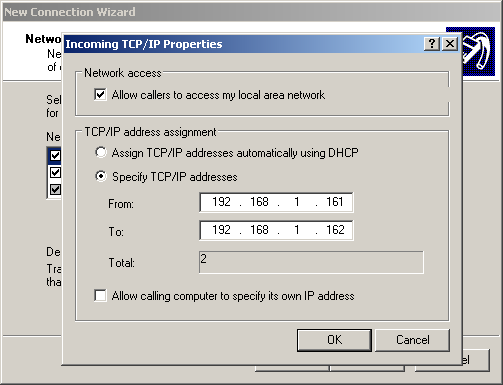
Here you need to enter the range of addresses for the network between the computer and calling clients. We have only one telephone line, so a range of two addresses (for the server and the client phone calling it) is sufficient. However, there is a small nuance...
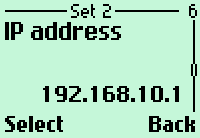
Correctly, you need to specify IP addresses that are not connected in any way to the networks to which the server is connected. For example, the server is given the address 192.168.1.30 from the network 192.168.1.0, where there is access to the Internet. Then for Dial-in network you can use, for example, 192.168.10.1 and 192.168.10.2, if not for one "but"...
There will be no connection between the Dial-in network and the network with the Internet! If both the Dial-in service and the WAP gateway are located on the same server, then this is not a problem; it will work with two networks, receiving and transmitting WAP data from one and HTTP from the other.
But if you need to give your phone access to the Internet, you’ll have to resort to a "dirty" trick. The DHCP server of the router of the first network issues addresses to devices from the range 192.168.1.10 - 192.168.1.150. Places from 151 to 254 are free. There we will place our Dial-in network, as if uniting them together.
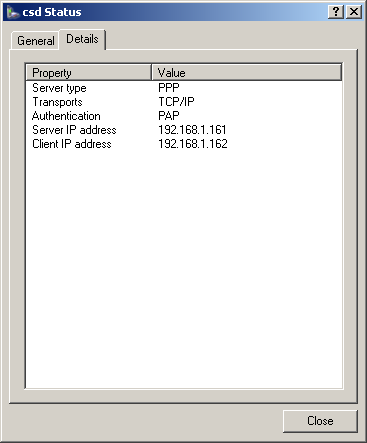
Yes, it’s not very good to do this, but then you won’t need to configure internetwork routing (this is a bit difficult on non-server Windows). Specifically, I took the addresses 192.168.1.161 and 192.168.1.162, for the server and client, respectively.
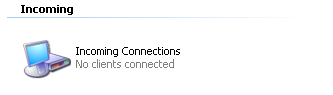
Now we have an incoming connection and the computer is ready to serve callers to the modem.
11. Setting up Dial-in service: Linux
Setting up Dial-in on Linux is more flexible, but at the same time much more complex than in the case of Windows. It is complicated, mainly because of the need to enter commands and edit configuration files. No beautiful interfaces for you, don’t even dream of it.WARNING: all actions are assumed to be performed as the root user.
First, connect the phone. For most manufacturers, USB drivers for the phone are already integrated into the system, so the system must detect our device.
Enter the command:
lsusb

As you can see, the phone is detected by the system (underlined in red).
Now we are interested in the COM port assigned by the system to the modem phone. In Linux there are no ports in the usual sense. There are only "files", when writing and reading which actually works with the COM port.
I'll call them file-ports. Typically, in the case of USB phones, their modems are assigned file ports /dev/ttyACM* or /dev/ttyUSB*, where * is a digit from 0. In the case of using a phone that has a COM cable, its modem must be available (if provided) on the real COM file port, usually /dev/ttyS* or /dev/ttyUSB* (if the COM cable is connected via a USB adapter).
Let's check the availability of the port:
ls -l /dev/tty<ACM or USB or S>*

Sometimes more than one file port is created for a phone (the rest are used for service functions), so it is important to check whether the correct port is selected. The terminal program minicom is useful for this:
minicom -D <file-port>

Using informational ATI commands, you can finally verify that this is the modem of our phone.


Now you can start setting up Dial-in.
To work, you will need two programs - mgetty and pppd. The first one works with the modem: it waits for a call, receives it and transfers control to the second program. The second program is a server of the PPP protocol. Accordingly, it carries out the authorization procedure with the client and, if successful, provides connection with the server machine (and with the local network, if internetwork routing is configured).
Let's install the programs that interest us:
apt install ppp mgetty
Create a Systemd service file for mgetty. With its help, the operation of the Dial-in service can be controlled similarly to the Kannel gateway.
vi* /lib/systemd/system/mgetty@.service
Insert the following lines into the file:
[Unit]
Description=External Modem %I
Documentation=man:mgetty(8)
Requires=systemd-udev-settle.service
After=systemd-udev-settle.service
[Service]
Type=simple
ExecStart=/sbin/mgetty /dev/%i
Restart=always
PIDFile=/var/run/mgetty.pid.%i
[Install]
WantedBy=multi-user.target
Now configure mgetty.
vi /etc/mgetty/mgetty.config
At the end add the following:
port <file-port, for example ttyACM0>
port-owner root
port-group dialout
port-mode 0660
data-only yes
ignore-carrier no
toggle-dtr yes
toggle-dtr-waittime 500
rings 1
speed 115200
modem-check-time 60
vi /etc/ppp/options
ms-dns <first DNS address, for example 8.8.8.8>
ms-dns <second DNS address, for example 8.8.4.4>
asyncmap 0
auth
crtscts
lock
hide-password
modem
+pap
debug
proxyarp
lcp-echo-interval 30
lcp-echo-failure 4
noipx
192.168.10.1:
netmask 255.255.255.0
Now create a file with a configuration for a specific modem:
vi /etc/ppp/options.<file-port, for example ttyACM0>
:192.168.10.2
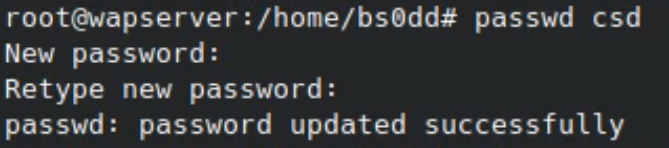
Create a user for authorization. By analogy with Windows, it will be called "csd".
useradd -G dialout,dip,users -m -g users -s /usr/sbin/pppd <username, for example csd>
Assign it a password:
passwd <username>
After entering the command, the program will request a password for the user (it will not be visible on the screen).
Then you need to re-enter it to confirm it is correct.
Editing pppd authorization settings:
vi /etc/ppp/pap-secrets
Add a line with data of user:
<username> * "<password>" *
Please note that the password must be enclosed in quotation marks.

In fact, this Dial-in setup is complete.
But if direct Internet access is required, you need to configure internetwork routing (step is optional, you can skip it and go to running mgetty through Systemd). Enable routing support in the system. To do this, edit the sysctl file:
vi /etc/sysctl.conf
You need to uncomment this line:
net.ipv4.ip_forward=1
Apply the changes with the command:
sysctl -p /etc/sysctl.conf

Now for routing we need a packet filter - iptables (netfilter). It will perform routing between networks.
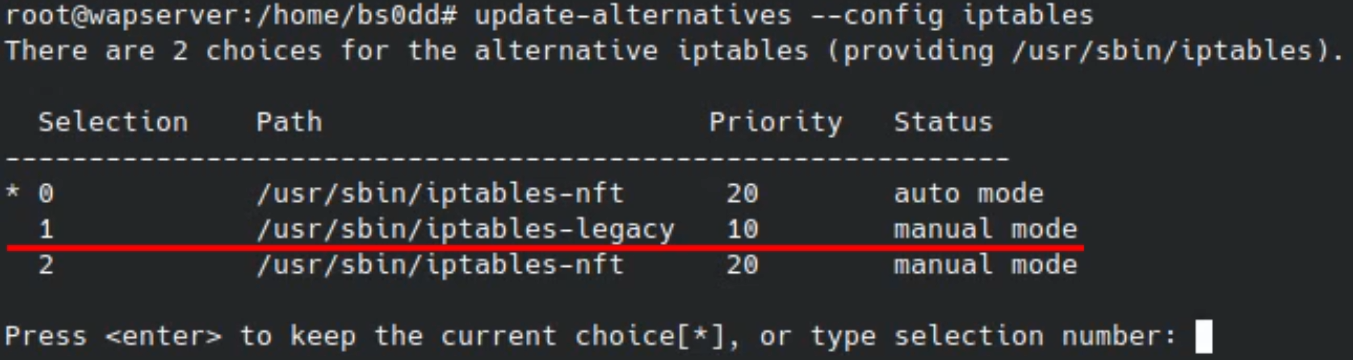
First, let's switch it to legacy mode.
update-alternatives --config iptables
Before adding a rule, you must first find out the name of the network adapter through which we are connected to the Internet. Enter:
ip a
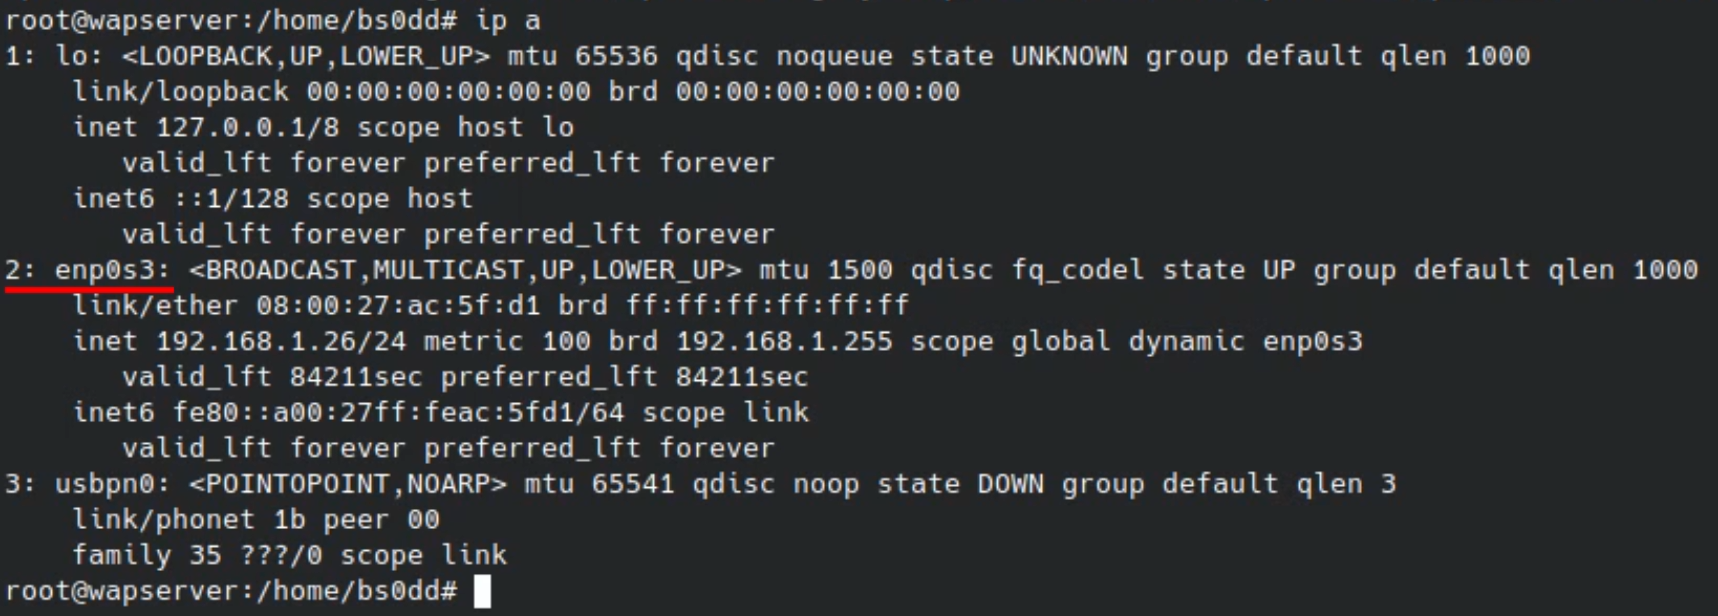
In my case the interface is called enp0s3.
Create a rule for iptables:
iptables -t nat -A POSTROUTING -s 192.168.10.0/24 -o <interface name> -j MASQUERADE
Check for the presence of a rule in iptables:
iptables -t nat -L
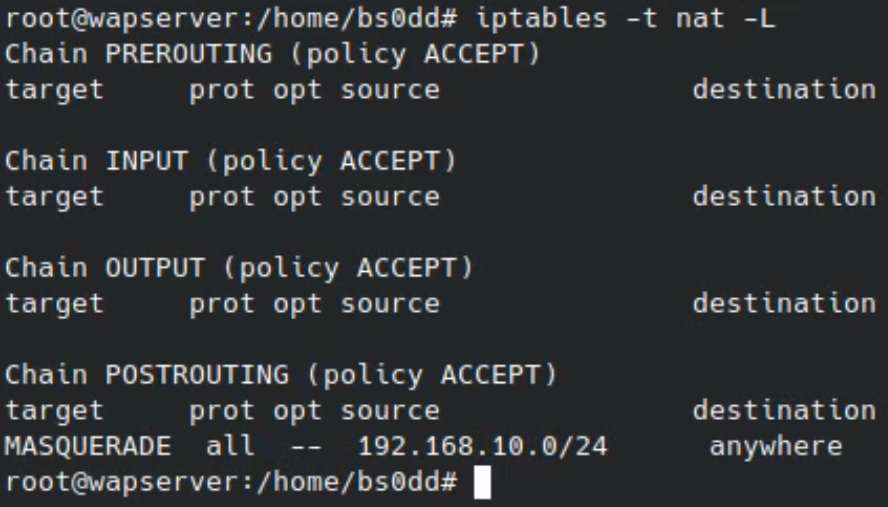
The rule, as expected, is located in the POSTROUTING table.
To avoid losing iptables settings every time you start iptables, you can install the iptables-persistent package.
apt install iptables-persistent

In the future, if you need make any changes to the settings, you will need to manually save them with the command:
iptables-save > /etc/iptables/rules.v4
To include mgetty in the list of services automatically launched at system startup, use the command:
systemctl enable mgetty@<file-port, for example ttyACM0>
In my case the service name will be mgetty@ttyACM0.
To start a service, use the start keyword (and stop to stop):
systemctl start mgetty@<file-port, for example ttyACM0>

The service is launched and awaits calls from clients!
It's time to set up a WAP profile for CSD.
12. Setting up a profile and accessing WAP on a real phone with CSD
Having a WAP gateway and Dial-in service on the server, you can finally access WAP and older phone with CSD.At the same time, in this case it is not at all necessary to configure public access to the WAP gateway, you just need to specify the internal network address of the server (in my case 192.168.1.161 for Windows server and 192.168.10.1 for Linux server), provided that the gateway is running on the same computer.
Sample profile settings:
- Homepage: any WAP site with WML pages, for example wap.bs0dd.net.
- Session mode (relevant for Nokia): permanent
- Connection security: no
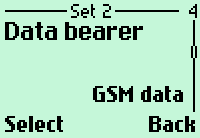
- Data bearer: GSM data
- Authentication/authorization type: normal/without protection
- Dial-up number: *number inserted into modem*
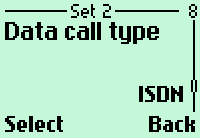
- Data call type: ISDN (if it doesn't work, try "Analog")
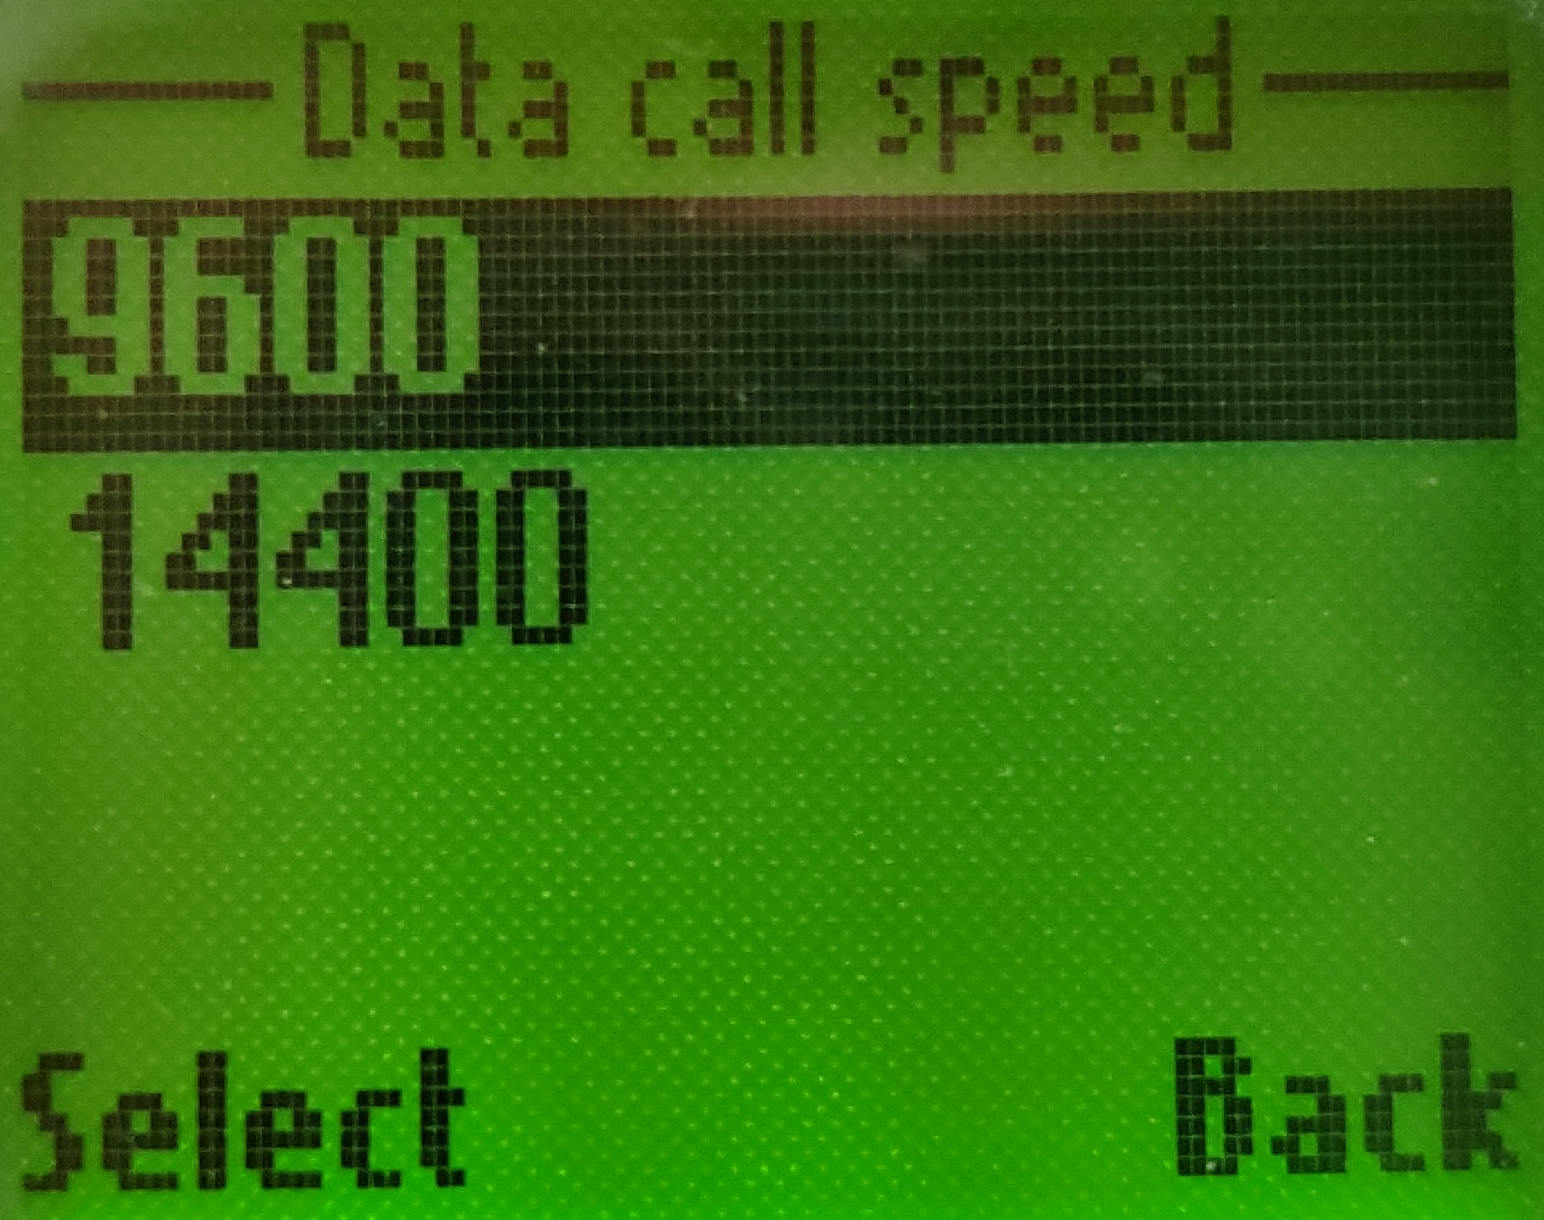
- Speed (if you have a choice): 9600 (operators rarely support HSCSD 14400)
- Login: *specified when creating the Dial-in user*
- Password: *specified when creating the Dial-in user*
- IP address (protocol/gateway): *address of your (public/internal) or someone else's gateway*
- Port (if required): 9201

Please note that in the case of Windows the computer will pick up the handset on the modem not immediately, but after the second RING signal from the phone modem (this is approximately 5 seconds). In the case of Linux the handset is picked up immediately by the RING signal (configured by the rings parameter in this place).
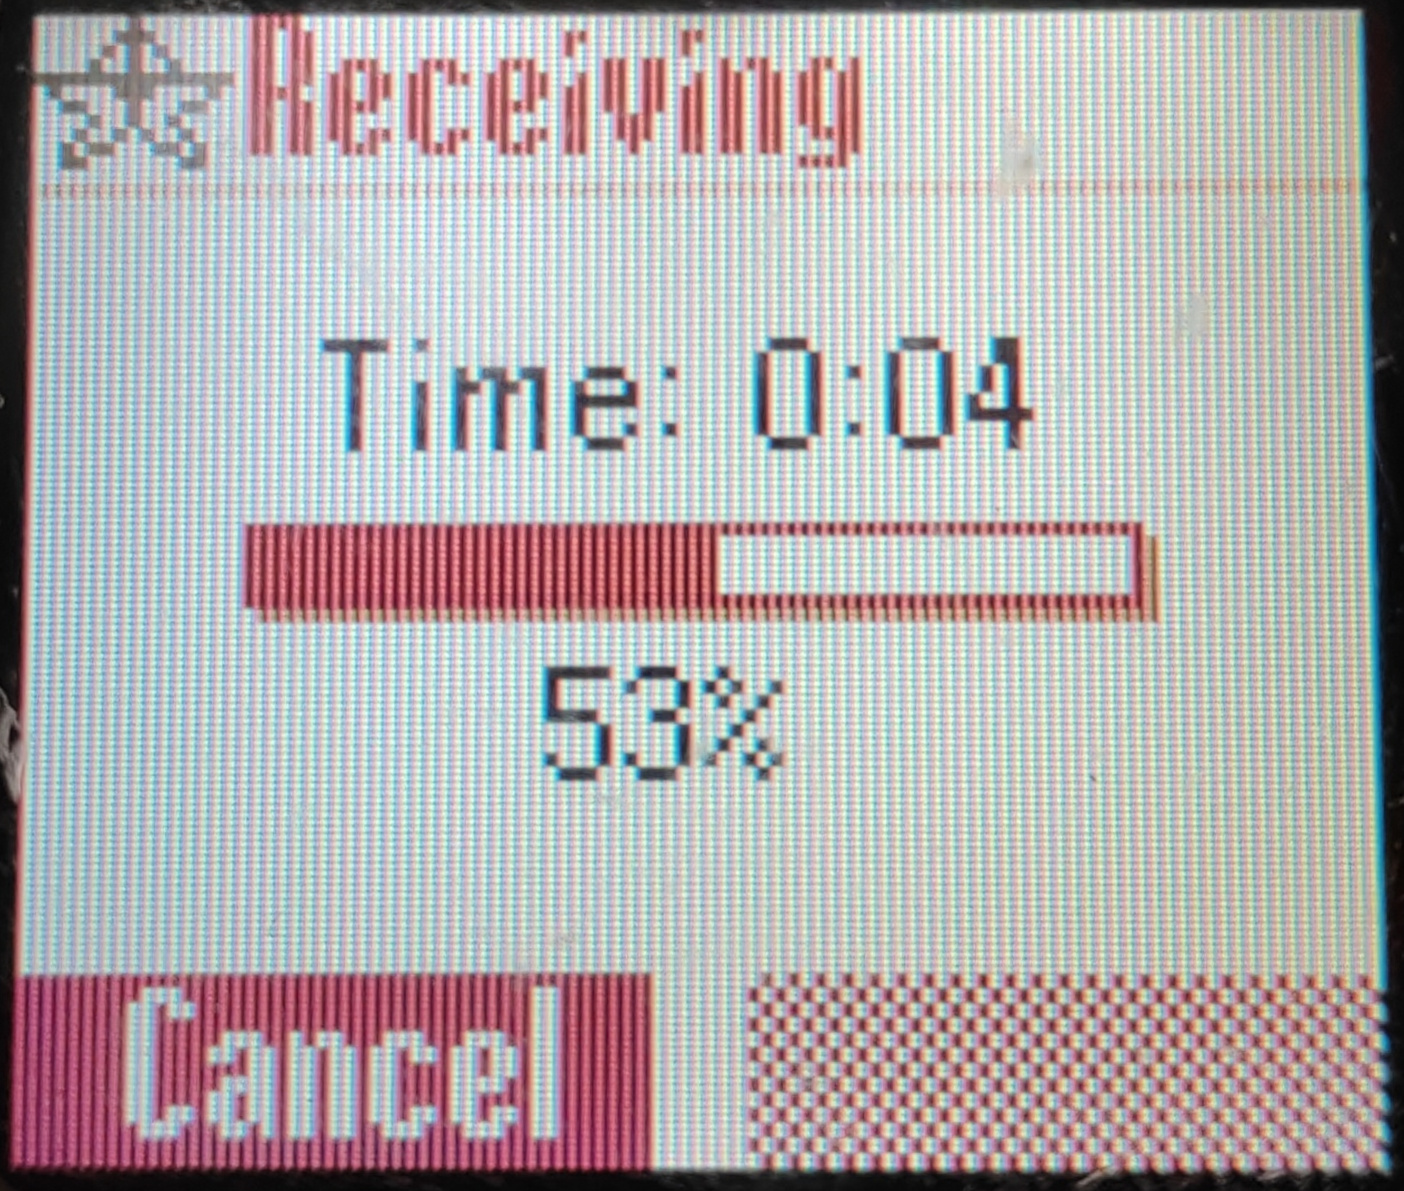
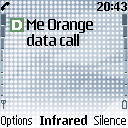
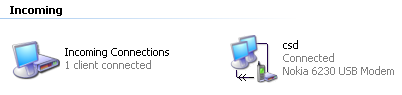
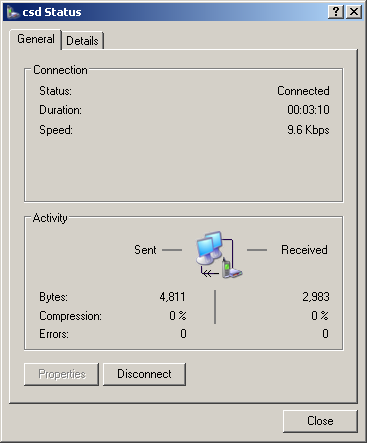
Once the connection is established (in Windows), the corresponding icon will appear in incoming connections:
If the gateway is working, the Dial-in server and profile in the phone are configured correctly - the page should open.


13. To the attention of people who have opened their public WAP gateways and Dial-in services
If you organized your WAP gateway and/or Dial-in service and decided to make it public, please contact me via contacts on the home page of my site.Currently a list of actual WAP gateways is being compiled, and list of Dial-in services (maybe I’ll even open my own if I have a normal USB modem).
I’ll be glad to every open public gateway and CSD Dial-in service.
03 December 2023 year, 23:23:11 CET
Comments
#1
|| Left by: ndevtools || Date: 05 June 2024 year, 19:53:13 CEST
Жаль что не все операторы разрешают data call. Но огромное спасибо за данную инструкцию! Действительно огромный вклад.
Переключиться на Русский
Powered by COMPPAG 0.54
2022-2024 © Compys S&N Systems